When it comes to setting up your golf simulator and the surrounding space, lighting can play a vital role in creating an optimal environment for your projected image, your safety, and the accuracy of your launch monitor.
In this article, we'll address some common questions about golf simulator lighting, including how to place lights, where to position them, and whether they can interfere with launch monitor readings. Let's brighten up the discussion and shed light on this important aspect of your indoor golfing experience.

How To Place Lighting In A Golf Simulator
Placing lights in a golf simulator involves a strategic approach to ensure proper illumination without creating glare, washing out the projected image, or interfering with the gameplay. Consider the following locations.
Overhead Lighting
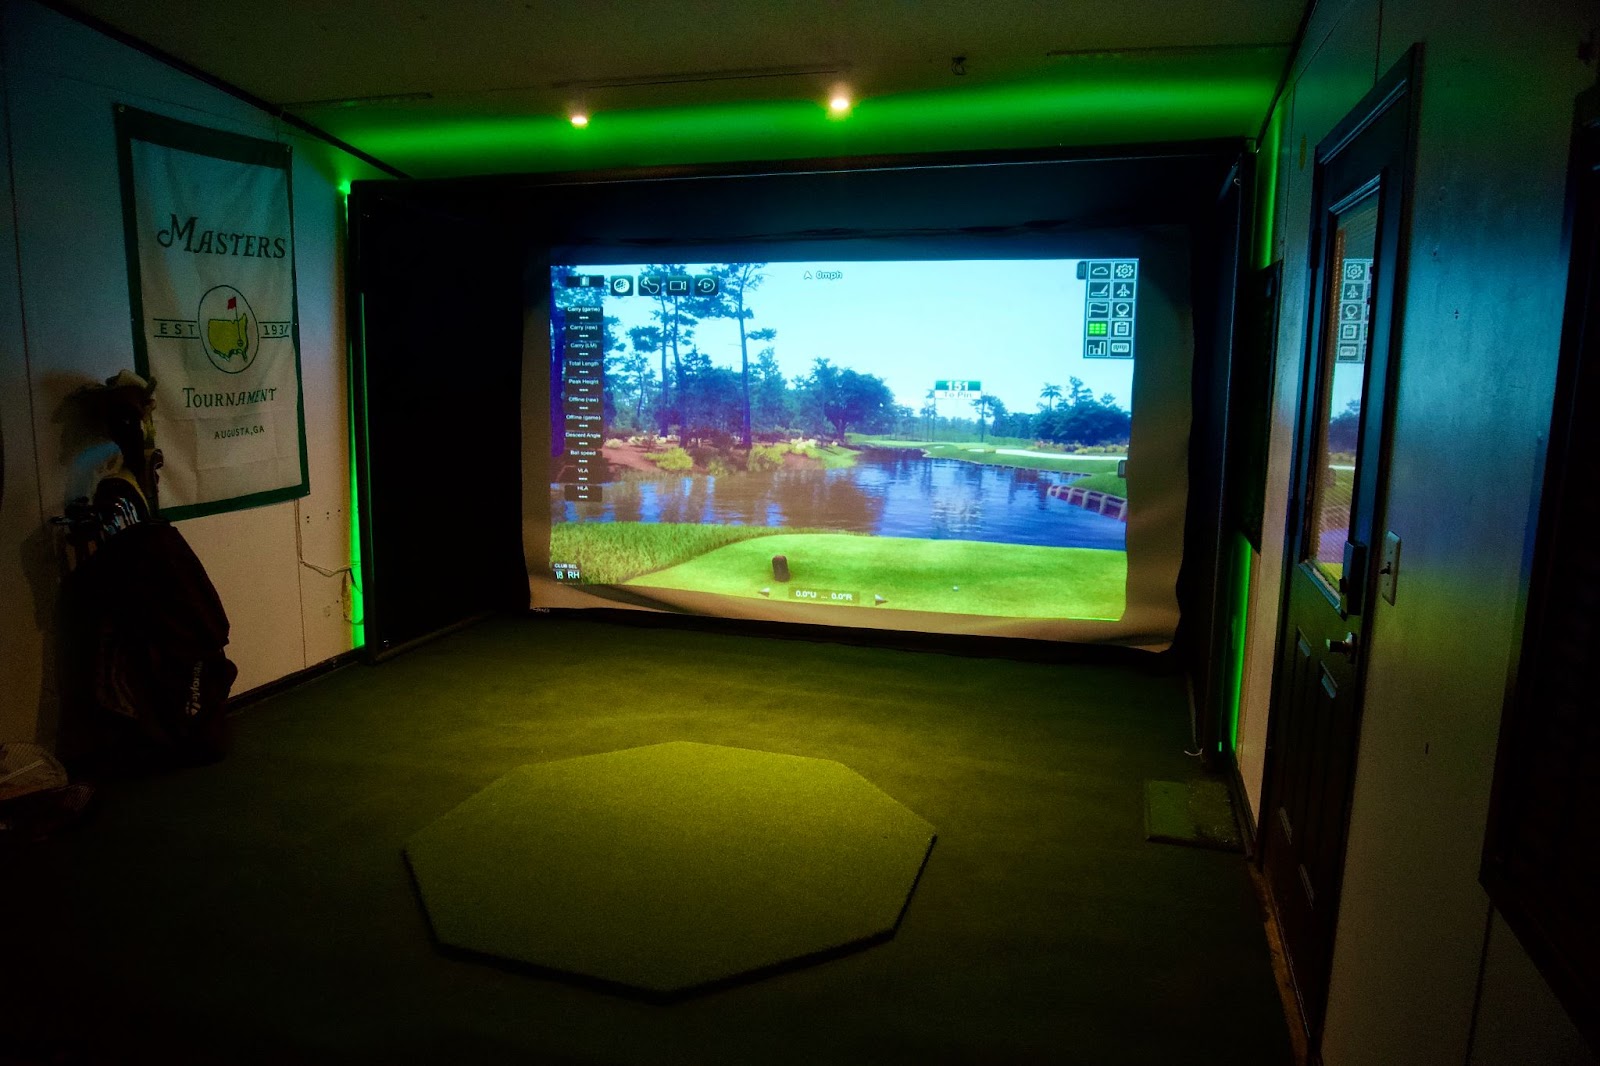
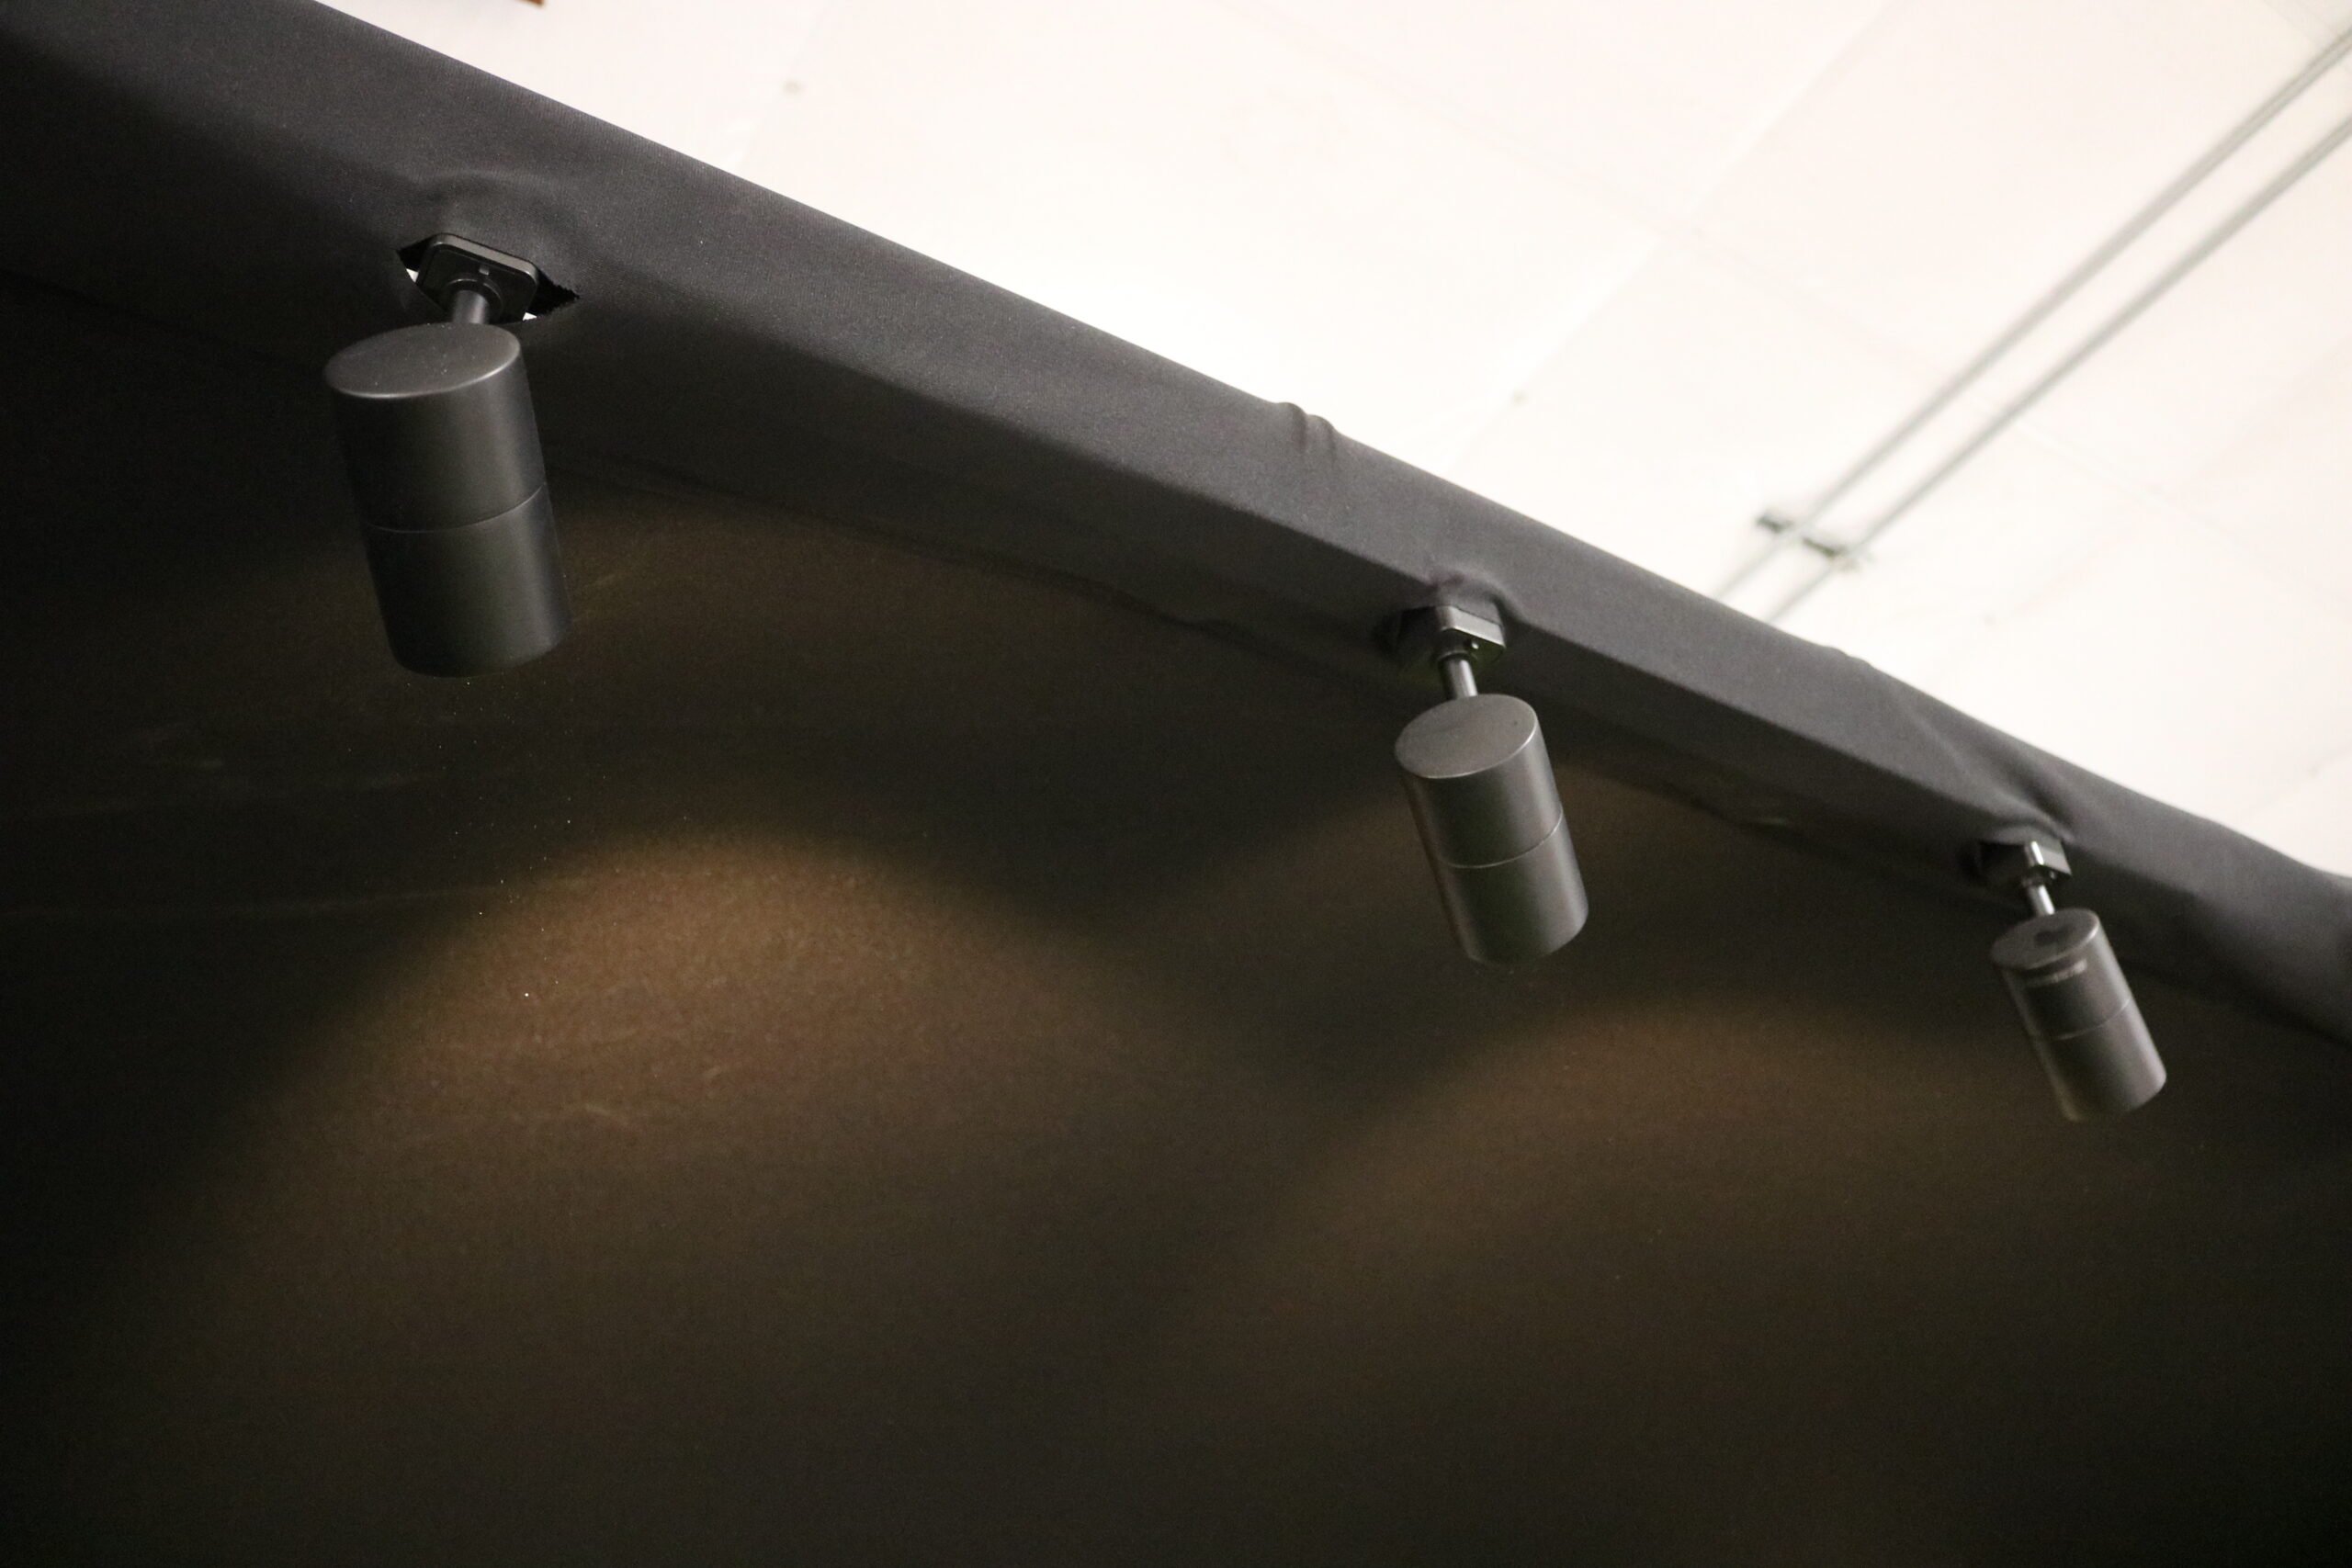
Install overhead lights to provide general illumination in a golf simulator. Position them directly above the hitting area but at a sufficient height to prevent shadows on the screen and minimize glare. Using soft track lighting placed above the hitting area, but away from the projected image on the impact screen, is a common solution. Check out how we did some DIY golf simulator lighting by mounting track lighting to our enclosure.
Another overhead lighting idea is a focusable spot light for a golf simulator with a beam that you can point directly at the hitting area. This can help the golfer see the ball better in a darker environment without lighting up the entire room or impact screen too much, but also help the launch monitor get more accurate readings.
Side Lighting
Add side lighting in a golf simulator to minimize shadows and enhance visibility.
Place wall-mounted sconces or adjustable spotlights on the sides of the simulator area. Point the lights up at the ceiling to help soften the light and create a nice ambiance, or direct a spotlight at the hitting area so that it doesn’t affect the projected image.
Floor Lighting
Floor lighting adds ambiance to your golf simulator and can help reduce eye strain during gameplay. Consider installing LED strip lights along the border of your hitting mat, turf or general golf simulator area to create a subtle glow.
Speaking of LED strip lights, you could also use them to back-light your enclosure, setting a fun vibe for your area.
Surrounding Areas
Illuminate the surrounding areas, such as the entryway or seating area, to provide a comfortable environment for players and spectators. You likely will not want it to be too bright to the point of where you need sunglasses, but you want it bright enough so your guests don’t trip over anything of value such as your launch monitor.
Where Should I Put Lights In A Golf Simulator?
As shown above, there are four key spots where you can place your golf simulator lights: overhead (for visibility, such as a spot light over the hitting area), side lighting (which minimizes shadows), floor lighting (to add ambiance), and lights in surrounding areas (for safety). But there are also places you should definitely avoid placing lights in your golf simulator.
Here is Carl’s advice on where NOT to put lighting in a golf simulator:
-
Avoid placing lights where they will shine on your impact screen, or interfere with the projector’s beam of light toward the impact screen.
-
Be aware of lights or windows behind the impact screen, unless you have a back cover to block the ambient light out. Light coming in the back side of the impact screen can wash out the projected image.
-
Avoid placing lights at angles that create unwanted reflections, which can be distracting and interfere with visibility and accuracy.
-
If your setup includes a lot of ambient light, you’ll want to get a projector with a better lumen (brightness) output. Look for one with upwards of 3,000 lumens. Or, check into a gray impact screen that helps in brighter situations.

Does Lighting Interfere With Launch Monitor Readings?
Lighting should not interfere with the accuracy of launch monitor readings. In fact, the tricky part is that some launch monitors might read better with more light.
However, it's crucial to be mindful of potential glare or reflections that could impact the launch monitor's ability to track shots accurately. Also be mindful to not light your area too much where it washes out your projected image.
Consider the following precautions:
-
Glare Reduction: Position lights at angles that minimize glare on the simulator screen and launch monitor sensors. Test different golf simulator lighting setups and adjust as needed to avoid direct light hitting the screen or creating unwanted reflections.
-
Hitting Mat Surface: Some hitting mats are shinier than others. Keep that in mind in case a glare off the hitting mat is causing a misread from your launch monitor.
-
Calibration: Properly calibrate your launch monitor according to the manufacturer's instructions with the amount of lighting you plan to use.
When it comes to golf simulator lighting, strategic placement is key. By strategically positioning overhead, side, and floor lights, you can create an immersive and safely lit environment for an enjoyable indoor golfing experience.
Remember to be mindful of glare and reflections to prevent any interference with launch monitor readings and the projector’s light beam or image. With the right lighting setup, you'll be able to see your shots clearly, improve your swing, and bring the joy of golf right into your home or facility.
Let there be light (but not too much), and let your game shine!
Search articles by tag:
Golf SimulatorsRelated Posts
Golf Simulators, Post-Purchase
Adding Track-Lighting to your Golf Enclosure
.webp)
Golf Simulators, Computers
Golf Simulator Computers
Golf Simulators, GSPro, Post-Purchase
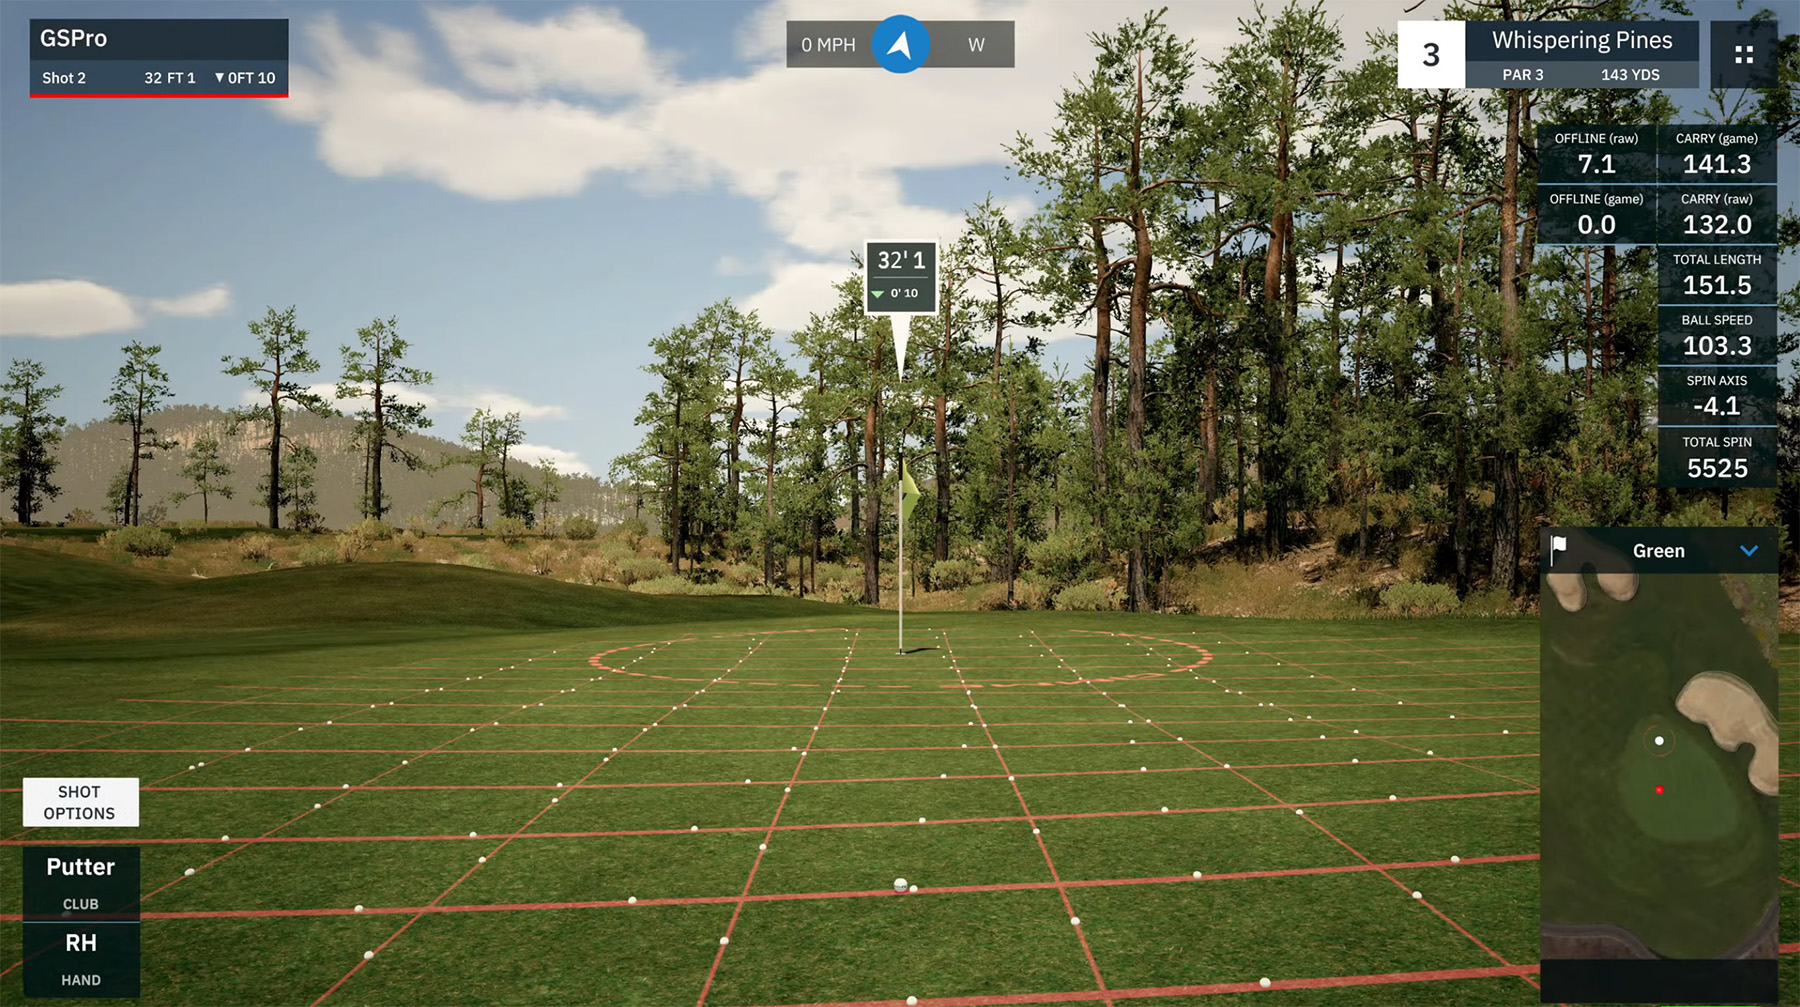
Golf Simulator Putting: How It Works, GSPro Settings and Practice Tips