How to transform your room with a built-in golf simulator. Wall padding safeguards your space, and a wall-to-wall screen creates a captivating indoor golf room.

There are many ways to create your own home indoor golf haven. You can piece together the entire project to try to save money, go a more convenient route such as using an enclosure and impact screen from Carl, or find the ideal room to install a built-in golf simulator.
What is a built-in golf simulator?
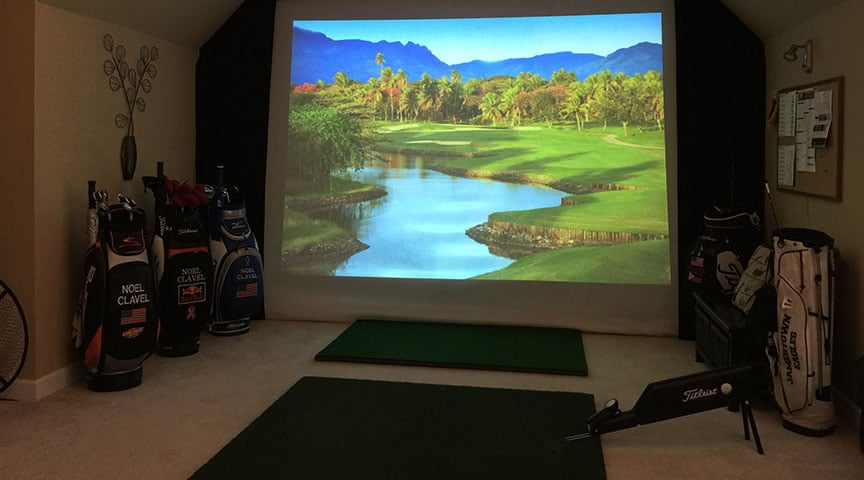
A built-in golf simulator is a complete and permanent installation of a commercial or residential golf simulator room in a designated area. Unlike portable or temporary setups, a built-in simulator is seamlessly integrated into the room's design, providing an immersive and uninterrupted golfing experience.
A built-in golf simulator typically includes:
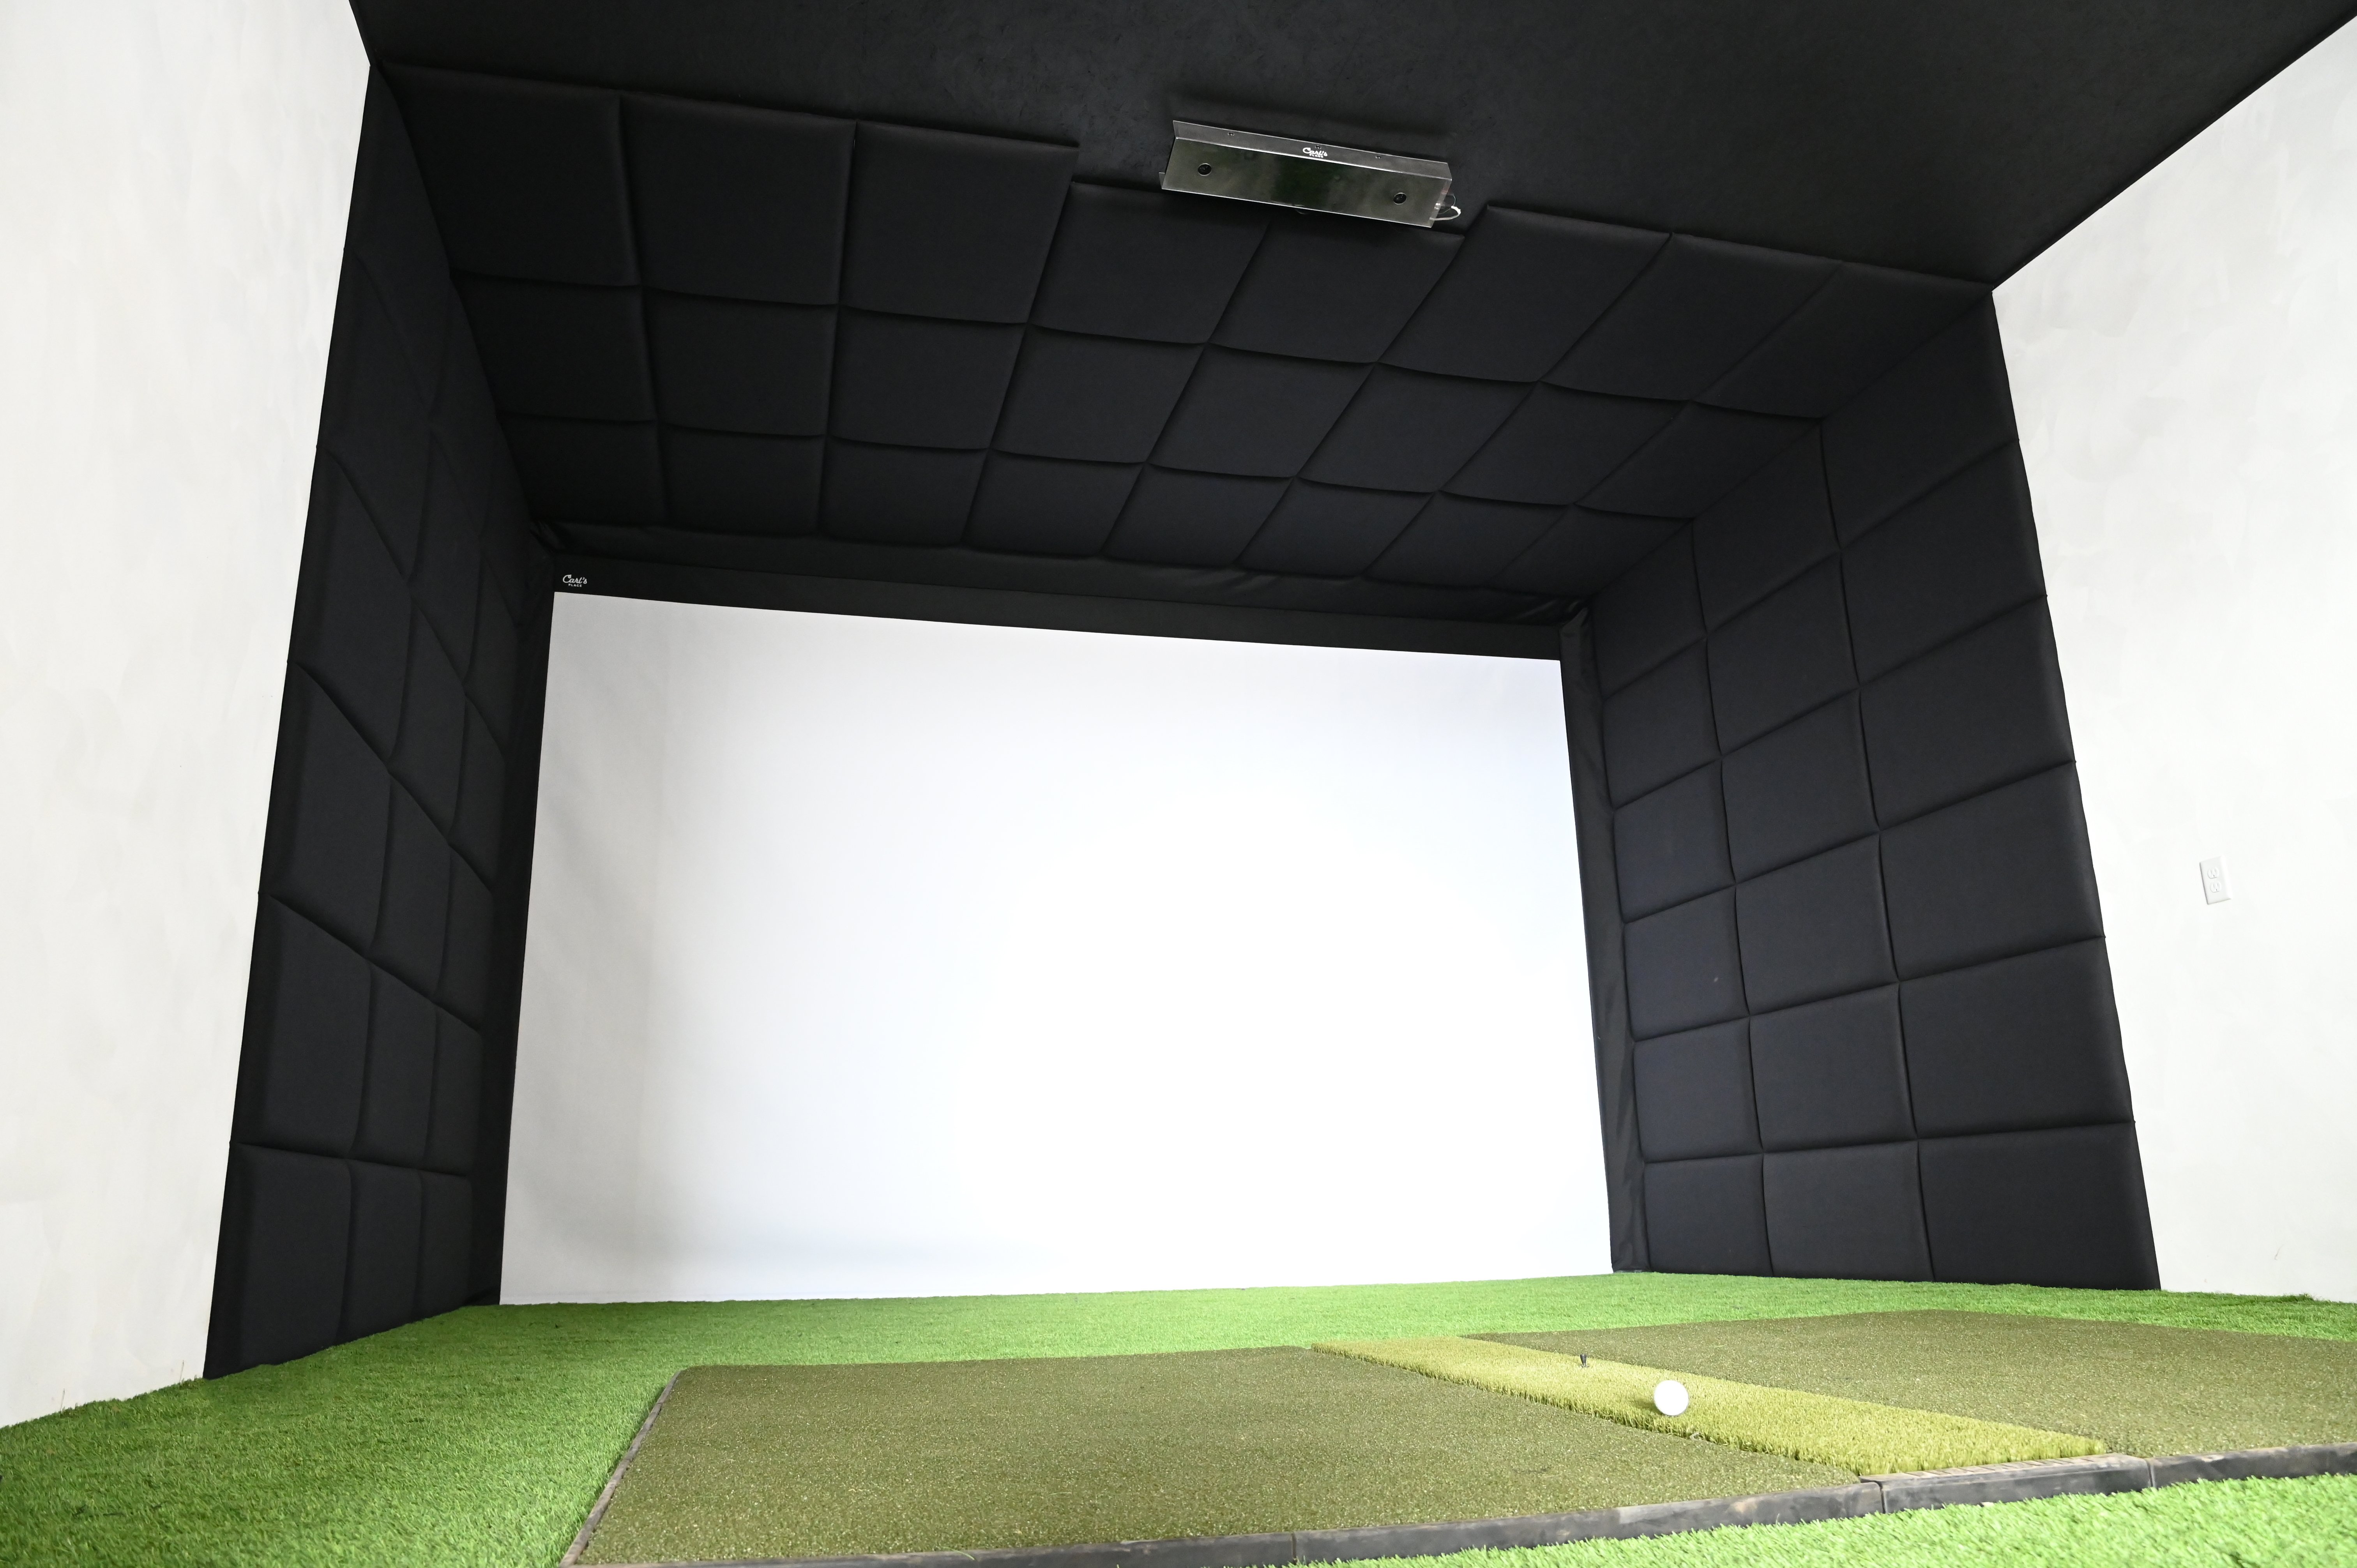
- An impact screen that stretches from wall to wall, and floor to ceiling, with several different mounting options.
- Golf simulator foam panels to pad and cover the walls and ceiling.
- Turf to cover the floor and make it feel more realistic. The hitting mat can be inset into the turf for that seamless mat-to-turf and turf-to-screen visual.
Arguably, a built-in golf simulator is the most realistic-feeling version of a golf simulator. So what are the steps you need to take to make this dream come true?
- Plan: Review the setup instructions and measure to ensure everything fits perfectly.
- Set the Framework: Install cables and anchors to create a sturdy foundation for the impact screen.
- Hang the Screen: Use cables and zip ties to hang the screen, then adjust for proper tension.
- Protect the Walls: Install curtains or padded panels to safeguard the walls.
- Protect the Ceiling: Add padded panels to the ceiling for extra protection.
- Get Ready to Golf!
How Much Room Do You Need For A Built-In Golf Simulator?
Before you embark on creating your golf haven, it is crucial to carefully consider your golf simulator room size, layout of the available room, and who will be using it. By doing so, you can ensure that you have enough space to execute a fluid swing and move comfortably throughout your practice sessions.
If you are the sole user, then you can opt for a more compact area. This allows you you to focus your launch monitor research on the accuracy of the unit.
However, if you plan on inviting family and friends over to enjoy the experience with you, it would be wise to allocate more space, particularly in terms of width, to accommodate a central hitting area for both right-handed and left-handed players. Additionally, having a variety of software options that offer interactive course play, enjoyable games, and other engaging features would enhance the overall experience for your guests.
It is essential to measure the dimensions of your space accurately. This will help you determine if you have enough room to create the golf haven of your dreams. Our recommendations include:
- Height: 9-10 feet. Many golfers can get away with 9 feet, but some might need upwards of 10 feet. This will provide you with ample overhead clearance, allowing you to swing freely without any hindrance.
- Width: at least 10 feet for a single golfer, and at least 14 feet for a central hitting area with righties and lefties playing. You won’t want to hit your wall or golf simulator side panels with a back swing or follow through.
- Depth: 18 feet. With a foot of buffer space behind the impact screen, and 10 feet between impact screen and tee, that leaves you with 7 feet to swing comfortably behind you. You’ll want plenty of depth so you don’t feel cramped and change your swing because of it. Also, radar-based launch monitors require at least this amount of depth.
Requirements for Carl's Built-In Golf Room
In order to accomplish an install of Carl's built-in golf room kit, you must:
- Have straight, even, 2x4 framed walls.
- Have a level area where the golf screen can be installed 1' away from the wall.
- Be confident in using laser levels to align all components accurately.
- Be prepared to demo any trim boards that may obstruct screen or panel placement.
- Use lag screws to anchor into the top and bottom plates of your walls.
- Have the patience to tension and adjust the screen for a perfect fit.
- Follow our provided diagram to visualize and lay out the wall and ceiling panels.
- Attach cleats to studs or use drywall anchors, then hang each panel until the space is covered.
If you're feeling unsure about tackling the installation of the Built-In Golf Room Kit on your own, it might be a good idea to seek assistance from a more experienced friend or contractor. Another option is to explore Carl's DIY and Pro Enclosures, which offer customizable solutions that can easily adapt to various spaces.
It's essential to have a perfectly square space with level floors and ceilings, as the rectangular panels may reveal any extra space due to room sloping. To address this, you can consider options like custom-cut trim or painting the walls black to blend in with the panels.
If you're unsure about handling these awkward spaces, Carl’s Place offers DIY and Pro Enclosures that can be tailored to fit most spaces.
How To Mount Your Impact Screen Without An Enclosure
With a built-in golf simulator, indoor golfers have to get creative with how they plan to mount their impact screen to their walls.
The most common DIY solutions include installing an angle iron or unistrut frame, creating a wall-mounted frame out of EMT, using eye hooks in a wall-mounted wood frame, or just using eye hooks directly into your wall stud.
Make sure your frame that’s going to hold the impact screen up is at least a foot off the wall behind the screen, leaving a buffer space for the screen to move as the balls make impact.
Once you have the frame installed in your room, you’ll want to make sure the edges of your screen is finished in a way that can attach to said frame. Most of the time, that’s using zip ties or ball bungees that go through a grommet on the impact screen, and then through the mounting point on your frame. Use zip ties or remove ball bungees evenly around the screen to adjust the tension to your liking.
Check out our article on the different custom impact screen finishes we can offer indoor golfers.
Another way to mount your screen is with Carl's Built-In Screen Kit, which uses corner anchors, a cable and a turnbuckle to create a "frame" for the impact screen to connect to. Watch the assembly video to get a better understanding.
To secure the screen properly, attach the corner cable anchors to the top and bottom plates of your wall. Avoid using drywall anchors for this task, as they may not provide sufficient support.
How do you protect the walls in golf simulator room?
You've got a couple of top picks for shielding your golf simulator room's walls and ceiling. Curtains and foam wall panels are the go-to choices.
Why do you need this protection? Some golfers can launch balls at insane speeds, like over 200mph for the big hitters. Imagine one of those rockets meeting your drywall head-on – it's like a heavyweight champ throwing a punch! That's why you've got to armor up your space against those stray shots.
Golf Simulator Side Panels
Golf simulator side panels attach to your walls and/or ceiling to act as your enclosure. Instead of having a free-standing, movable enclosure, your side panels turn your walls black and make the environment more immersive.
Golf simulator side panels have many benefits, including:
- Safety: they protect the walls and ceiling drywall from errant shots, and in turn, protect the golfer from any crazy ricochets.
- Acoustics: they can act as acoustic panels for your golf simulator, helping dampen the noise from your club striking the ball and the ball striking the impact screen.
- Image Quality: use them as golf simulator blackout panels to help keep ambient light under control for a brighter projected image.
- Overall Aesthetics: provide a more aesthetically pleasing overall look of your built-in golf simulator. They create a sleek and professional appearance, making your room feel more like a dedicated golfing space.
Make sure to take your time measuring and calculating the area of wall and ceiling you want covered in wall panels.
Many built-in golf simulator setups use adhesive to stick the panels to the wall. Another way of connecting golf simulator panels to your wall include using French cleats and Z clips, which are part of Carl's Built-In Kit. The panels included in Carl's kit do come pre-assembled, but they require you to connect them to your walls using Z clips and a French cleat for a seamless installation process.
Place a French cleat on your wall and a Z clip on your panel. Place the panel and Z clip just above the French cleat and slide the panel Z clip into the French cleat - similar to how you would hang a picture on the wall.
Golf Simulator Curtains
Golf simulator curtains are also an option for wall protection for your built-in golf simulator.
Most of the time, curtains are used in golf simulators when you still need access to a window or door, but want to temporarily block out ambient light and make your space look cleaner.
Golf Simulator Turf
Having turf flooring in your built-in golf simulator is not necessary, but it’s certainly helps you feel more like you’re out on the golf course.
There are many different options for golf simulator turf, though. You can get a shaggier, higher pile turf that looks like actual grass, or you can look into putting turf that helps you practice your green game a little more.
There are also in-between options, as well as ones that have both a fringe cut and putting green option.
Golf Simulator Hitting Mat
Many golfers will put their turf on top of foam puzzle piece gym mats, which allows them to cut out portions of the flooring to make putting cups or inset their hitting mat or hitting strip.
Benefits of insetting your hitting mat into your flooring in your luxury golf simulator room include a more realistic feel and a smoother putting surface (instead of your ball falling off the edge/lip of a hitting mat).
Other Built-In Golf Simulator Benefits

Of course, a built-in golf simulator has all the same benefits as any golf simulator: the convenience to work on your game whenever you want, save time and money, so on and so forth.
But built-in golf simulators are some of the best to use for other forms of entertainment. Sure, you can watch movies and sports, or play games, on any golf simulator, but when the entire simulator screen is built into the room and there aren’t enclosure walls to try to see around, it makes the experience that much better.
Add some nice speakers or a little surround sound and some recliners, and you’ve now got yourself a legit home theater, which could even increase the value of your home.
Choosing Simulator Components
Selecting the right components sets the stage for a stellar experience.
One of the key components that contribute to this immersive experience is the launch monitor. This innovative device can capture details of your ball and club, providing you with valuable data and insights to improve your game. Whether you're analyzing your swing speed, ball spin, or launch angle, the launch monitor ensures that you have access to accurate and reliable information that can help you refine your skills.
The projector is another crucial component. With high-quality display capabilities, projectors can create a mesmerizing visual experience that makes you feel like you're standing on the lush green fairways of world-renowned golf courses.

Finding a hitting mat that feels like a fairway and won’t ruin your joints is often overlooked. Many try to go budget-friendly here, but it doesn’t always pay off in the long run.
Planning Equipment Placement
Strategize the placement of sensors, projector, and screen for optimal interaction.
In addition to considering the functionality of the placement, it is also important to pay attention to the aesthetics of your simulator room. Organized cable management plays a vital role in preventing unsightly clutter and maintaining the overall visual appeal of the space. No one wants to be distracted by tangled wires or messy cables while lining up that crucial putt.
To achieve a clean and organized look, consider using cable management solutions such as cable clips, cable sleeves, or cable trays. These tools will help you neatly route and secure your cables, keeping them out of sight and out of mind.
If this is too much to even start thinking about, check out Carl’s Golf Room Design Service, where our experts do the heavy lifting and planning for you.
Enjoy Your Built-In Golf Simulator
Creating your dream built-in golf simulator room is a journey that merges technology, design, and your passion for golf. By following this comprehensive guide, you're well-equipped to craft a space that caters to your practice needs and provides endless entertainment.
Step into your simulator room and unlock a world of personalized indoor golf that promises rewarding swings, challenging courses, and the thrill of the game—all within the confines of your own home. Get ready to tee off!
Search articles by tag:
Golf Simulators Golf EnclosuresRelated Posts
Golf Impact Screens, Golf Simulators, Projectors, Golf Enclosures, Launch Monitors, Hitting Mats, Software
The Ultimate Golf Room Checklist

Golf Impact Screens, Resources
$5k Budget Golf Simulator Setup Ideas
Golf Impact Screens, Golf Enclosures
How To Install Carl's Built-In Golf Room Kit