Many golf enthusiasts, such as Carl’s Place customer Jacob, are transforming their garages into an indoor golf simulator setup. However, as Jacob found out, transforming your garage into a golf practice area could require some thoughtful planning and modifications.
Jacob, like many others, discovered that his garage was the optimal space for a golf simulator due to its generous ceiling height of 10 feet. With ample swing space for his 6-foot frame, the garage seemed like the ideal location.
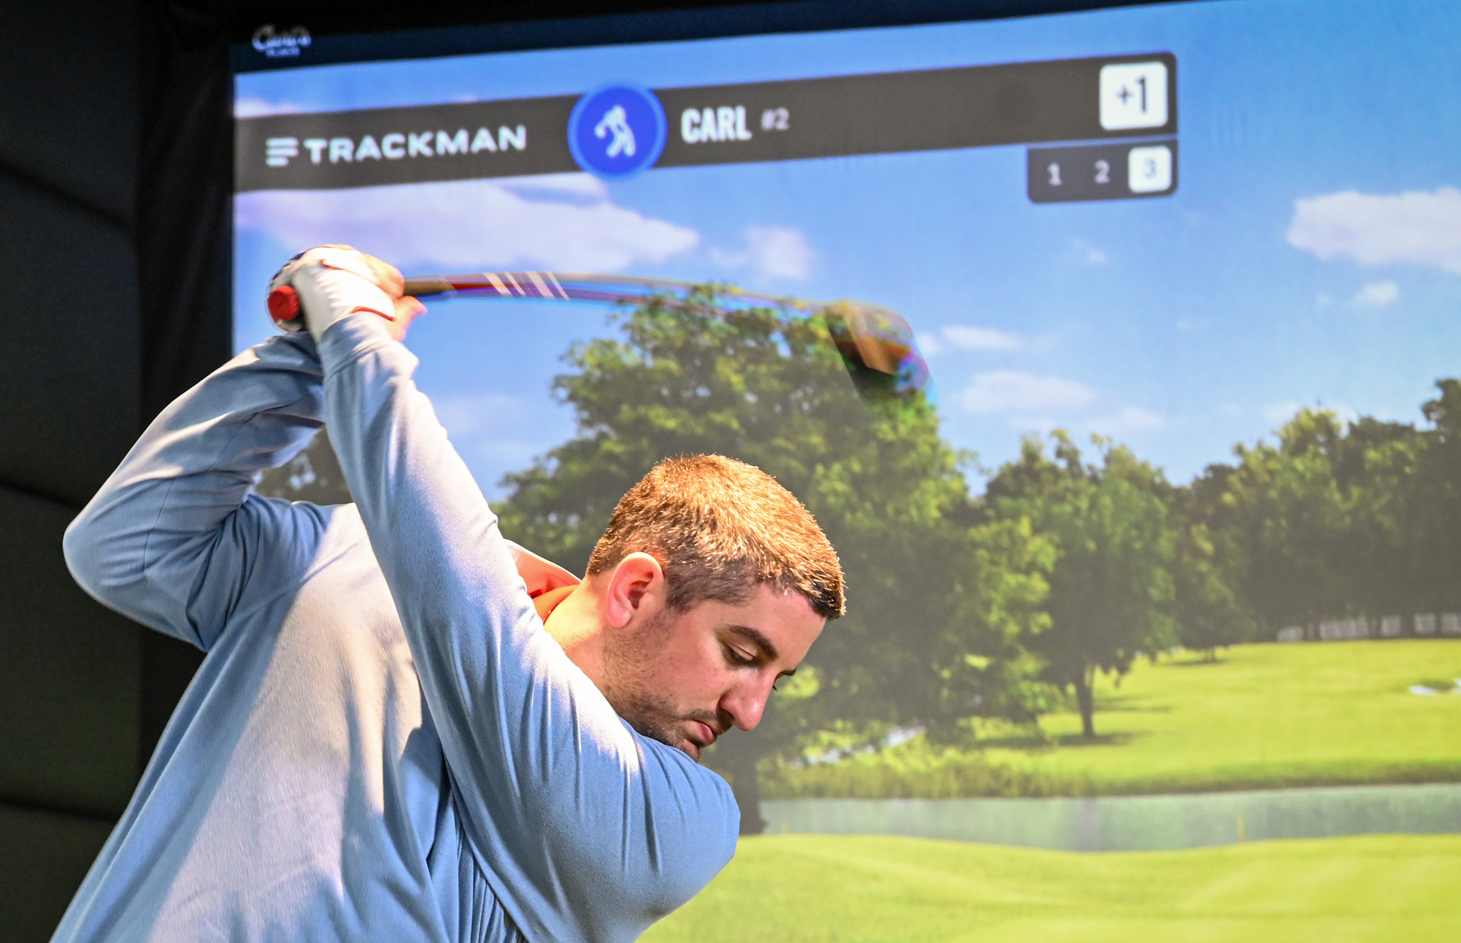
“Ceiling height was an issue in all rooms excluding my garage,” Jacob said
However, there were some obstacles standing in the way: the garage door opener and rails.
"I realized the rails were an issue while working with the Carl’s Place design team," Jacob explained. "Based on the recommended distance from screen to tee (10 feet), the rails were in the way of both right- and left-handed golf swings."
Can you spot the differences between the before and after photo above? Thanks to Jacob for providing these photos.
Below, we’ll take you through the important steps to consider before, during and after moving your garage opener and rails for a golf simulator. Note that this is just one way of working around this space constraint!

ASSESS YOUR SPACE
First, you’ll want to evaluate the current layout of your garage and identify the optimal location for the golf simulator setup. Consider factors such as space availability, height clearance, and accessibility.
This is something the Carl’s Place design team and Jacob talked over before it was decided the golf simulator needed to be placed in a location where the garage rails would need to be moved.
Faced with this challenge, Jacob embarked on a mission to find a solution. After thorough research and consultations, he decided that installing a high lift kit for his garage door and installing a side mounted garage opener was the way to go. These kits, commonly used for vehicle maintenance (or creating space for golf simulators), elevate the garage door tracks closer to the ceiling, providing more clearance for swings.
CONSULT EXPERTS
Once you’ve officially decided that the garage rails need to be moved to make room for your swing, you’ll likely want to contact a professional garage door technician to assess the feasibility of relocating the rails and opener. They’ll be able to provide expert advice on the best approach and any potential challenges.
Sure, if you’re handy enough, this job could be DIY’d. But moving something as important and intricate as garage rails is not something we recommend doing by yourself.
Jacob decided to use a professional company to move the rails as he said he was “less confident in my handyman skills for this job.”
Nate, who is part of Carl's design team, also suggested hiring experts as a job such as moving and remounting garage door equipment can be dangerous.
PLANNING AND PREPARING
Work with the technician to develop a plan for relocating the rails and opener. This may involve adjusting the positioning, installing new mounting hardware, or even completely reconfiguring the system.
Clear out any obstructions from the garage and prepare the workspace for the relocation process. This may include removing items stored near the garage door and ensuring there's ample room to work.
“I asked the company doing the installation how close the high lift kit would be to the wall/ceiling to prepare for how much new space would become available,” Jacob said. “This gave me some time to think more about placement of the hitting location and projector when I went back to Carl's Place to discuss the modifications made.
Jacob also contacted an electrician to install a power outlet on the ceiling near where the side mount garage opener was going to be installed.
RELOCATING AND INSTALLING
The technician will carefully disassemble the existing rails and opener, taking care to disconnect any electrical components safely. They'll then relocate or adjust the mounting hardware to accommodate the new setup.
Once the rails and opener are in their new position, the technician will reinstall them securely. They'll also test the system to ensure it operates smoothly and safely.
Jacob said it was difficult being patient through the process as he was anxious to get more swings in to improve his golf game. From planning to completion, it took about two months.
POST PROJECT
After installation, the technician will test the garage door to ensure it opens and closes properly without any issues. They may need to make further adjustments to optimize performance.
Be sure that a final inspection of the garage door system is conducted to verify that everything is functioning correctly and meets safety standards.
Jacob also installed a ductless mini-split system in his space for comfort and air flow.
“It’s worth considering if your space is not temperature controlled,” Jacob said. “The summer months in the garage without air flow would deter me from using the simulator and the ductless system made a huge difference.”
Now that the job is finished, Jacob wouldn’t hesitate to do it again.
“I would recommend a side mount garage and high lift kit option for anyone who wants more space in their garage which could serve multiple purposes, notably the golf simulator in my space.
“I cannot wait to start improving my game and being able to practice more frequently!”
Search articles by tag:
DIY Golf Enclosures Golf Simulators PRO Golf Enclosures Golf EnclosuresRelated Posts
.jpg)
How-To, DIY Golf Enclosures, Golf Simulators
Garage Golf Simulator: An Easy DIY Setup
Golf Impact Screens, Golf Enclosures
How To Install Carl's Built-In Golf Room Kit
Golf Simulators, Launch Monitors, Hitting Mats
Learning How To Practice Golf At Home