You know the goal: hit golf balls indoors without wrecking the room. The harder part is figuring out what kind of enclosure actually fits your space. Maybe that’s a freestanding DIY or Pro Enclosure for a garage or basement. Maybe it’s a Built-In Golf Room Kit for a dedicated golf room.
This guide helps you compare the main golf simulator enclosure types and choose the one that makes sense for your room.
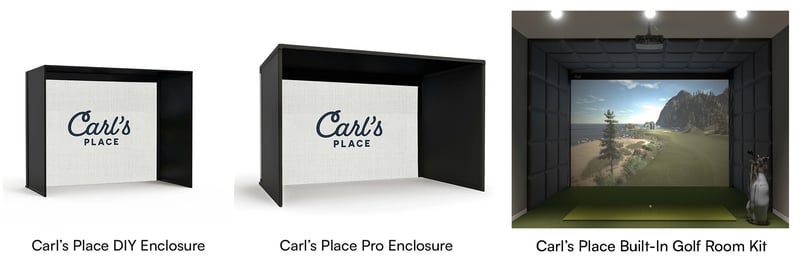
Golf Simulator Enclosure Types Compared
Not every golf simulator enclosure is trying to do the same job. Here’s the quick way to compare your options.
Best for home builds
DIY Enclosure
🏠 For home golfers who want a reliable setup they can use every day in garages, basements, spare rooms, and multipurpose spaces.
Frame: Freestanding enclosure with a 1" EMT frame
Screen options: Standard, Preferred, Premium, or High-Contrast Gray
Sizes: Custom sizing for a wide range of home spaces
Skill level: Simple DIY skills
Electronics: Use ground-based or ceiling-mounted electronics
Permanence: Flexible
Best for premium bays
Pro or Curved Enclosure
🏌️ For golfers who want a more structured setup with electronics mounting flexibility. For large home simulators, garages, and commercial spaces.
Frame: Freestanding enclosure with a 2" EMT frame
Screen options: Premium or High-Contrast Gray
Sizes: Custom sizing, including larger and deeper simulator bay options
Skill level: Moderate DIY skills, with more planning for size and mounted electronics
Electronics: Can mount electronics to the frame
Permanence: Flexible, but more substantial
Best for dedicated rooms
Built-In Golf Room Kit
🛠️ The room-integrated, wall-to-wall, floor-to-ceiling option for golfers who want the cleanest, most permanent simulator space.
Structure: Wall-anchored cable system built into the room
Screen options: Standard, Preferred, Premium, or High-Contrast Gray
Sizes: Designed around the room for a wall-to-wall style setup
Skill level: More involved DIY project with room measuring, mounting, and protection planning
Electronics: Use ground-based or ceiling-mounted electronics
Permanence: Pretty darn permanent
Still not sure? Start with your room dimensions in Carl’s Build Your Own Golf Simulator tool, or contact our team for help choosing the right enclosure path.

What Does a Golf Simulator Enclosure Actually Do?
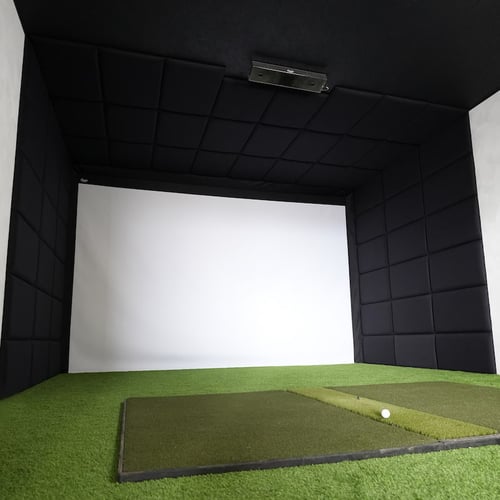
A golf simulator enclosure is more than a screen with some fabric around it. It is the part of the setup that makes indoor golf feel safe, real, and like something you meant to do on purpose. A good golf enclosure has these things in common:
- Fits your room: The best enclosure is the one that fits your ceiling height, room width, room depth, swing space, hitting position, projector placement, and screen size. A garage setup, basement setup, or multipurpose room all have different space/obstacle problems.
- Uses strong, well-made materials: A good enclosure should use components made for indoor golf, including a durable impact screen, protective enclosure material, sturdy hardware, and safety add-ons where needed. Carl’s enclosure kits are designed so that those pieces work together, instead of leaving you to guess your way through screen tension and protection.
- Keeps the balls contained: A good setup accounts for more than center-screen shots. It keeps misses, high wedges, ricochets, and side shanks in the playing area away from your drywall, windows, ceiling, or the poor lamp that never asked for this.
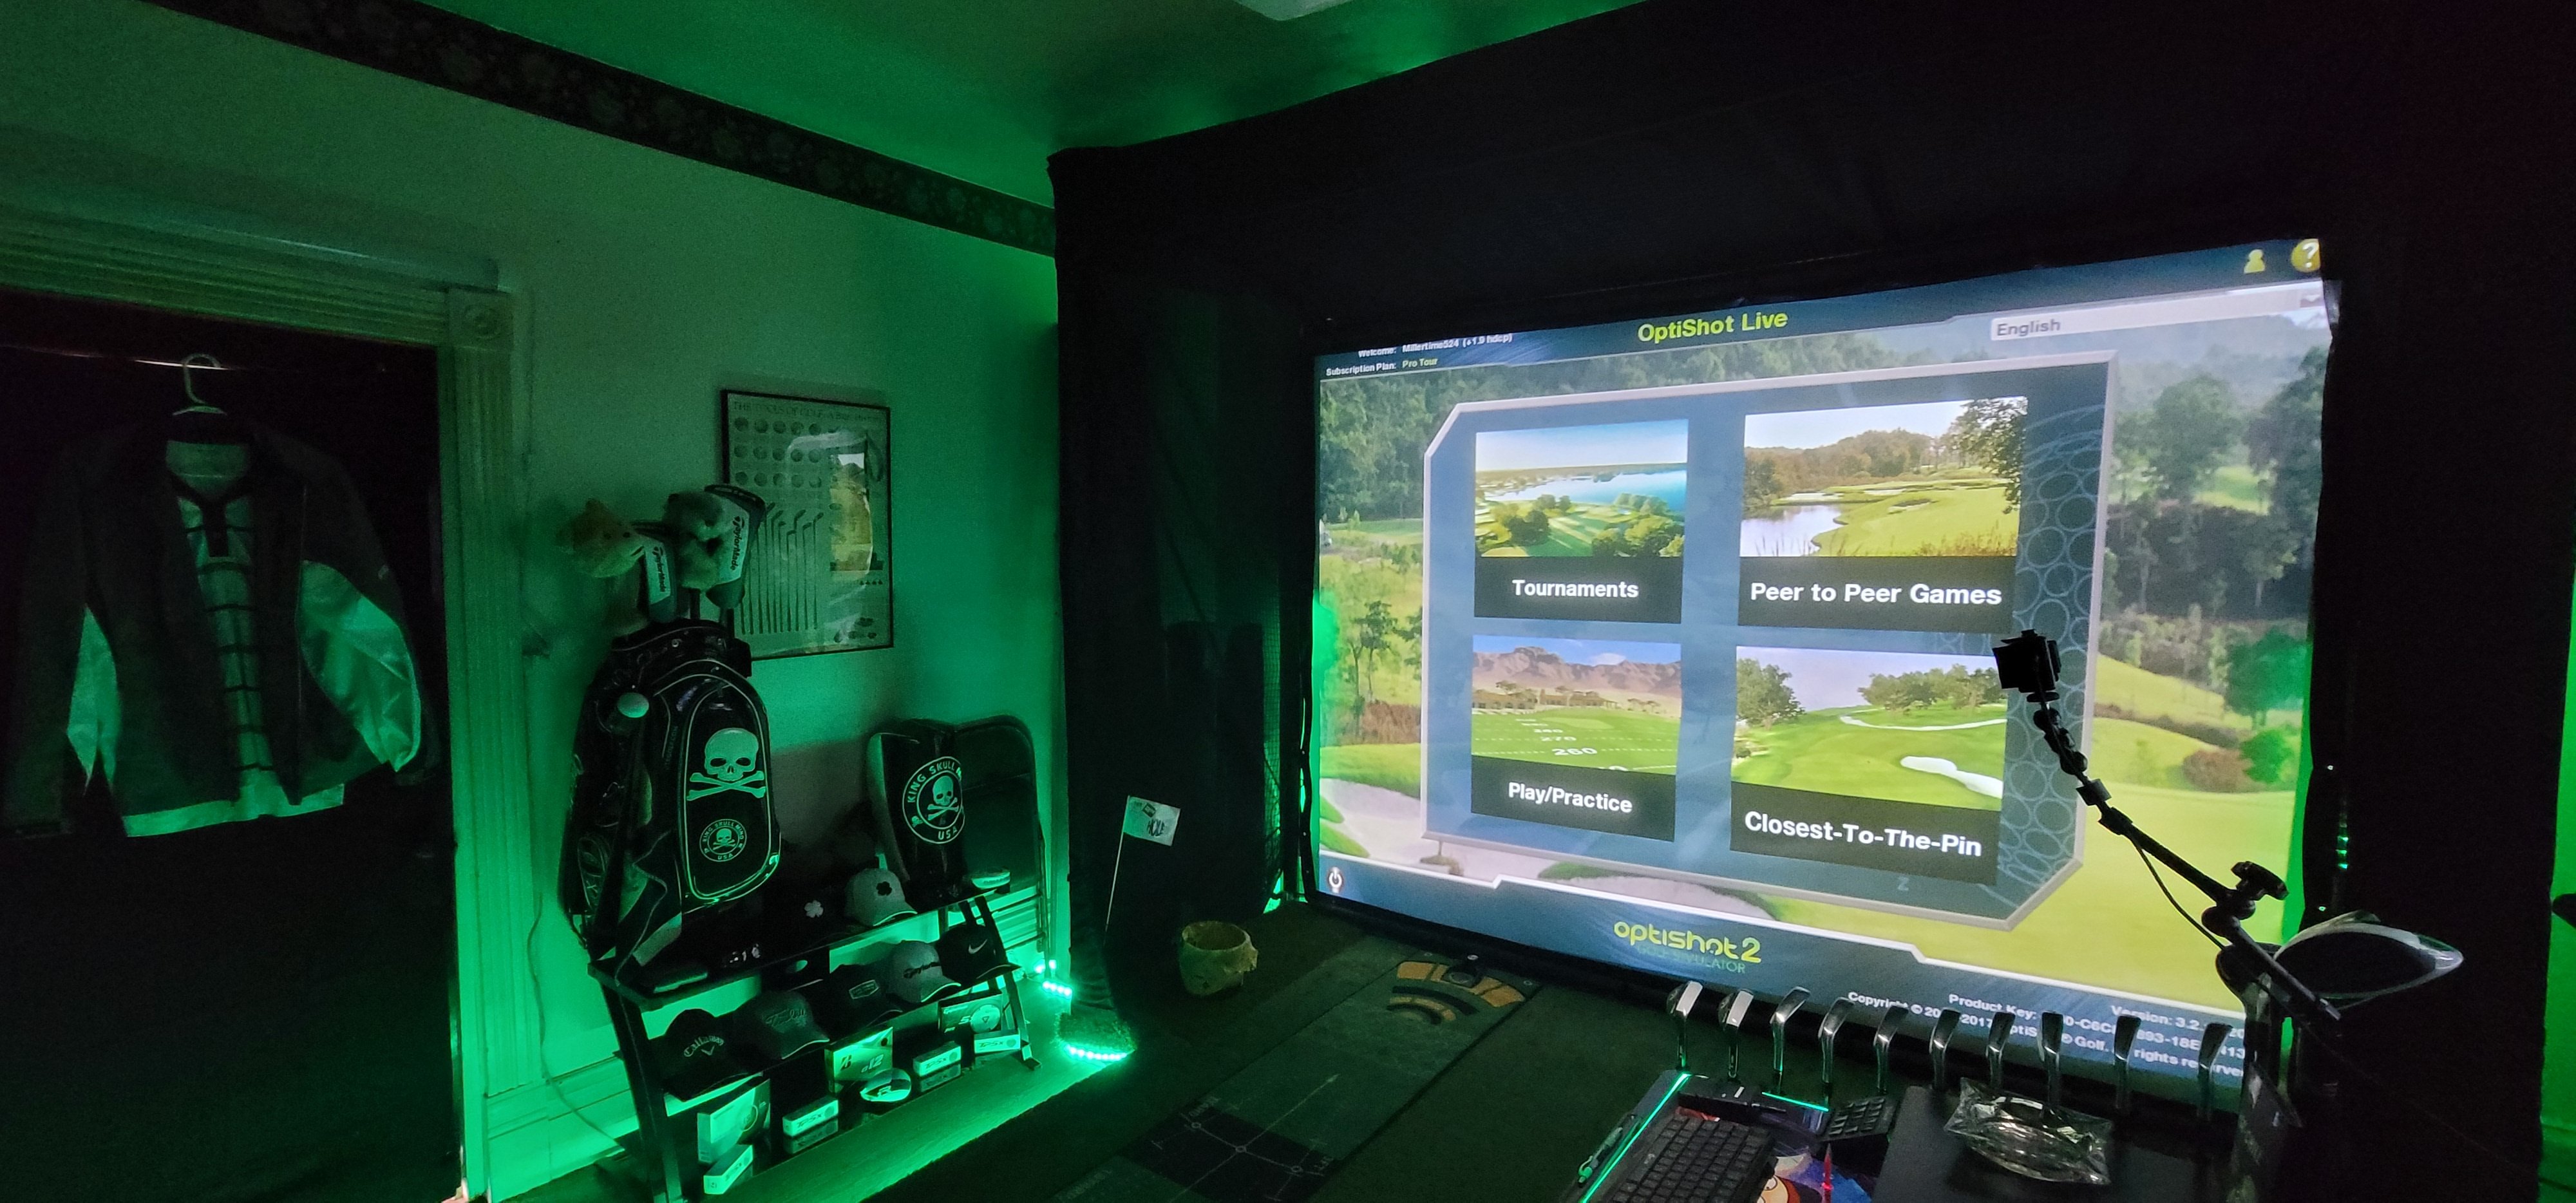
- Makes the screen image feel real: Dark blackout materials help cut down extra light around the screen, and quality screen materials make the projected image look better.
- Is easy to use: The best enclosure for you is one that fits your room, works with your launch monitor and projector setup, and doesn't make every round feel like you're setting up a campsite.
First Decision: Enclosure Inside the Room or Room as the Enclosure?
The main types of golf simulator enclosures are freestanding enclosure kits and built-in golf simulator room kits. Some golfers just want the impact screen so they can handle the rest themselves. All types solve the same basic problem: giving you a safe place to hit golf balls indoors. The difference is how much structure, protection, polish, and permanence you're after.
Most golf simulator enclosure decisions come down to this:
Freestanding Enclosure
A freestanding enclosure is a frame, impact screen, and enclosure material that sits inside your room.
Best Carl’s options: DIY Enclosure, Pro Enclosure, Curved Enclosure
Best for: Garages, basements, spare rooms, multipurpose rooms, and many commercial bays.
Built-In Golf Room
A built-in setup uses the room itself as part of the simulator. The screen and protection are integrated into the space instead of sitting inside a separate frame.
Best Carl’s option: Built-In Golf Room Kit
Best for: Dedicated golf rooms, finished simulator spaces, theater-style rooms, and permanent commercial or home installs.
If you want something easier to move, adjust, or build inside an existing space, freestanding usually makes more sense. If you want the cleanest finished room and plan to keep the simulator there long term, Built-In should be very much on the table.
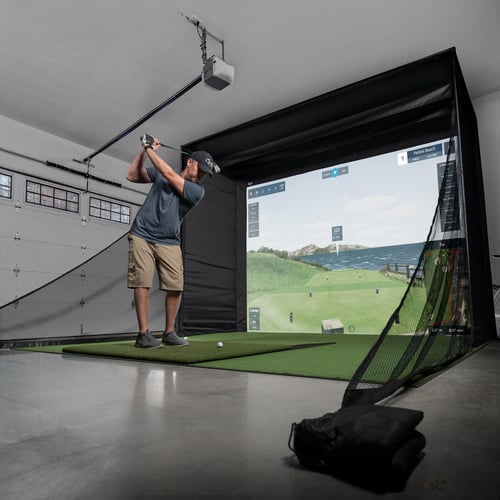
DIY Golf Simulator Enclosure: Best for Home Setups
The Carl’s Place DIY Golf Enclosure Kit is the straightforward freestanding option. It is made for golfers who want a reliable golf simulator enclosure without turning the whole room into a construction project.
 |
Carl’s DIY Enclosure at a Glance |
|
| Best for | Home golfers who want a durable, custom golf simulator enclosure. | |
| Frame | Freestanding enclosure with a 1" EMT frame | |
| Screen options | Standard, Preferred, Premium, or High-Contrast Gray | |
| Sizes | Custom sizing for a wide range of home spaces | |
| Skill level | Simple DIY skills | |
| Electronics | Use ground-based or ceiling-mounted electronics | |
| Permanence | Flexible | |
This is the setup that makes sense for a lot of garages, basements, spare rooms, and multipurpose spaces. You get an impact screen, enclosure coverage, fittings, and a design made to work together. You can add a pipe framing kit for an easier build, or source and cut the EMT yourself if you are the kind of person who owns more than one tape measure.
The DIY Enclosure uses a 1" EMT frame system and can be customized to fit your space. You can choose from Carl’s impact screen options, including Standard, Preferred, Premium, and High-Contrast Gray. Foam inserts, safety baffles, wall extensions, and other add-ons are available depending on how much protection your room needs.
DIY is probably the enclosure for you if...
- You want a custom golf simulator enclosure at a more approachable price.
- You are building in a garage, basement, spare room, or flex space.
- You want the screen, enclosure, and frame components to be designed to work together.
- You do not need the most built-out electronics mounting setup.
The biggest thing to remember: DIY does not mean flimsy. It means practical. It gives you an easy-to-assemble kit of well-engineered materials. So you can plan a better hitting space versus trying to piece together a random screen, secured to whatever sturdy thing you can find at the hardware store.
Think DIY is your fit? Shop Carl’s DIY Enclosure Kit.
Pro Golf Simulator Enclosure: Best for a More Finished Simulator Bay
The Carl’s Place Pro Golf Enclosure Kit is the premium freestanding path. It is for golfers who want their simulator to feel more like a dedicated bay and less like something they assembled between the lawn mower and the Christmas bins.
 |
Carl’s Pro Enclosure at a Glance |
|
| Best for | Premium home builds, dedicated simulator rooms, and commercial venues. | |
| Frame | Freestanding enclosure with a 2" EMT frame | |
| Screen options | Premium or High-Contrast Gray | |
| Sizes | Custom sizing, including larger and deeper simulator bay options | |
| Skill level | Moderate DIY skills, with more planning for size and mounted electronics | |
| Electronics | Can mount projectors, lighting, launch monitors, and other accessories to the frame | |
| Permanence | Flexible, but more substantial | |
The Pro Enclosure uses a 2" EMT frame system with BlackStop™ fabric and comes with either a Premium or High-Contrast Gray impact screen. Foam inserts are included, and optional add-ons can include back cover kits, ceiling safety baffles, mounts, and a crossbar for mounting electronics.
That electronics piece is a big deal. If you want to mount a projector, overhead launch monitor, lighting, cameras, or other gear from the enclosure, Pro is usually the better fit. The frame gives you more structure to build around, which matters when your simulator setup becomes more than “hit ball, hope screen survives.”
Pro is probably your lane if...
- You want a more polished freestanding simulator bay.
- You are building a dedicated golf room or commercial hitting bay.
- You want more options for mounting electronics.
- You want a stronger frame system with a more finished look.
- You want the setup to feel closer to a premium indoor golf experience.
DIY is the practical home build. Pro is the freestanding simulator bay. If you are planning the room around golf, hosting people, teaching lessons, or building something that needs to look finished, Pro deserves a hard look.
Think a Pro Enclosure is the way to go? Shop Pro Enclosures.
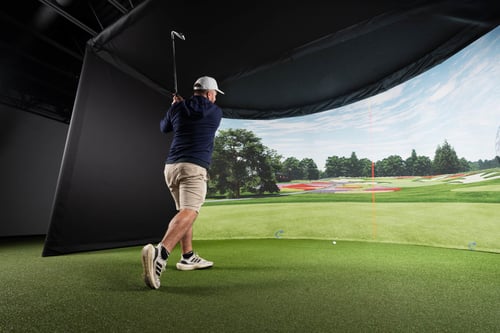
Curved Golf Simulator Enclosure: The Show-Stopper Version of Pro
The Carl’s Place Curved Golf Enclosure Kit is not the default recommendation for most people. It is bigger, more specialized, and more visually dramatic. But if the goal is to walk into the room and immediately say “Okay, that’s awesome,” Curved can do that.
 |
Carl’s Curved Enclosure at a Glance |
|
| Best for | Premium spaces where visual immersion and wow factor matter. | |
| Frame | Freestanding curved enclosure with a 2" EMT frame | |
| Screen options | Premium or High-Contrast Gray | |
| Sizes | Custom sizing for larger premium simulator spaces | |
| Skill level | Moderate DIY skills, with extra planning for room size and screen shape | |
| Electronics | Can use frame-mounted, ground-based, or ceiling-mounted electronics depending on setup | |
| Permanence | Flexible, but more specialized | |
Think of Curved as a premium freestanding option for people who want more immersion. It uses a sturdy 2" EMT frame system, Premium or High-Contrast Gray impact screen options, and a curved screen design that creates a wider field of view.
Curved makes the most sense when the visual experience is part of the point. That might be a premium home simulator, a commercial bay, a showroom, or a space where you want the simulator to feel less like a screen on a wall and more like stepping into the course.
Curved is worth considering if...
- You already want a premium freestanding enclosure.
- You have enough room for a larger visual setup.
- You care a lot about immersion and presentation.
- You are building a commercial, showroom, or high-end home space.
Want the big visual moment? Shop Carl’s Curved Enclosures.
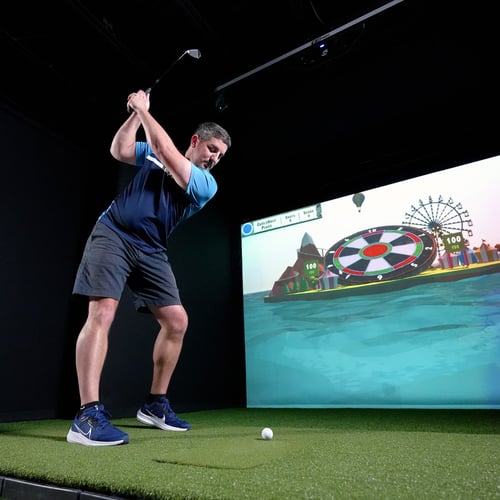
Built-In Golf Room Kit: Best When the Room Becomes the Simulator
The Carl’s Built-In Golf Room Kit is the option for people who do not want an enclosure sitting inside the room. They want the room to become the simulator.
That is a different mindset.
Instead of building a freestanding frame, the Built-In setup is designed to create a more permanent, room-integrated golf simulator. The impact screen creates a wall-to-wall look, and you can add wall and ceiling protection with options like padded panels, acoustic tiles, carpet tiles, or curtains depending on the room and the selected setup.
 |
Carl’s Built-In Golf Room Kit at a Glance |
|
| Best for | Permanent, room-integrated golf spaces with the cleanest finished look. | |
| Structure | Wall-anchored cable system built into the room | |
| Screen options | Standard, Preferred, Premium, or High-Contrast Gray | |
| Sizes | Designed around the room for a wall-to-wall style setup | |
| Skill level | More involved DIY project with room measuring, mounting, and protection planning | |
| Electronics | Use ground-based or ceiling-mounted electronics depending on the room layout | |
| Permanence | Pretty darn permanent | |
It's also great for multipurpose entertainment spaces. Golf is the reason the room exists, obviously, but the same screen setup can also work for movies, sports, and hosting. Finally, a room where nobody has to pretend the TV is big enough.
Built-In may be for you if...
- You want a permanent installation with the most finished golf simulator look.
- Your room meets the product requirements (perfectly squared off walls, ability to anchor lag screws into the wall plates).
- You have the patience, tools, and confidence to handle a more involved installation.
- You want to maximize the screen size in the room.
- You're building a home theater-style golf room, commercial simulator room, or premium entertainment space.
Built-In may not be your best fit if...
- You rent or may want to move the simulator later.
- You want quick setup and teardown.
- You struggle to put together bedroom furniture.
- You have antique trim boards that your spouse will cry about if you take them off.
The Built-In Golf Room Kit is still a DIY-friendly option for the right person, but it takes more planning than a freestanding enclosure. You are not just choosing a product. You are deciding what the room is going to be.
Ready for a wall-to-wall golf screen? Shop Built-In Golf Room Kits.
What If You Only Need an Impact Screen?
Some golfers buy only a golf impact screen and build the rest of the setup themselves. That can work, especially if you already have a plan for hanging the screen, managing bounceback, protecting the walls and ceiling, and safely finishing the space.
Screen-only gives you the most control, but also the most responsibility. You are in charge of the frame or mounting method, screen tension, side protection, ceiling protection, and the overall safety of the build.
.png?width=372&height=372&name=feg-gray-premium-screen%20(1).png) |
Screen-Only |
|
| Best for | Experienced DIYers who want to build the rest of the setup themselves. | |
| Structure | None included. You will need to build or plan your own screen support. | |
| Screen options | Standard, Preferred, Premium, or High-Contrast Gray | |
| Sizes | Custom screen sizing, with the rest of the build planned separately | |
| Skill level | Highest DIY planning required | |
| Electronics | Fully dependent on your DIY plans | |
| Permanence | Depends how you build it | |
For many golfers, an enclosure kit or Built-In Golf Room Kit is the simpler path because the screen, structure, and protection are designed to work together. But if you are a true DIY builder and you know what you are getting into, a screen-only setup can be a valid starting point.
Want to build it all yourself? Shop Golf Impact Screens.
Golf Simulator Enclosure FAQs
What are the different types of golf simulator enclosures?
The main types of golf simulator enclosures are freestanding enclosure kits, premium simulator bays, built-in golf room kits, curved enclosures, and screen-only setups. Carl’s Place offers options for each, from practical DIY Enclosures to premium Pro Enclosures, visually immersive Curved Enclosures, Built-In Golf Room Kits, and standalone impact screens for custom builds.
What makes Carl’s Place golf simulator enclosures different?
Carl’s Place enclosures are engineered specifically for indoor golf, with screens, enclosure materials, framing, fittings, foam inserts, baffles, and protection add-ons made to work together.
Are Carl’s Place enclosures good for home golf simulators?
Yes. Carl’s Place enclosures are a strong fit for home golf simulators because they are customizable, built for real golf shots, and available in different setup styles. DIY is great for practical home builds, Pro is better for more polished simulator bays, and Built-In is ideal when you want the room itself to feel like a finished golf space.
What is the best golf simulator enclosure?
For an easy home setup, Carl’s DIY Enclosure Kit is the best golf enclosure out there because it's customizable down-to-the-inch, made from durable materials, and supported by a five-star team of golf sim specialists. Carl’s Pro Enclosure Kit is a fantastic upgrade for a sturdy frame that can accommodate larger bays and mounted electronics. Carl’s Built-In Golf Room Kit is the best solution when you want the room itself to become the simulator.
Which golf simulator enclosure is best for a garage?
For most garage golf simulators, Carl’s DIY or Pro Enclosures are the best fit. Most garages can handle a freestanding enclosure, while still keeping access to the garage door rails as well as the large doors and windows. Pro makes sense if you have the space, since it's helpful to have the ability to mount electronics.
Which golf simulator enclosure is best for a basement?
For most basement golf simulators, start with DIY, Pro, or Built-In depending on ceiling height and how finished you want the room to feel. DIY works well for practical basement setups. Pro is a good fit if you have enough space and want a more polished bay. Built-In can work well when the basement is becoming a dedicated golf or entertainment room.
Which golf simulator enclosure is best for a commercial space?
For commercial golf simulators, Pro, Curved, and Built-In are the strongest paths. Pro and Curved are good fits for simulator bays that need durable structure and electronics mounting flexibility. Built-In is a strong choice when the room needs a more permanent, finished feel.
What is the difference between Carl’s DIY and Pro Enclosures?
Carl’s DIY Enclosure is the affordable freestanding option for many home setups. Carl’s Pro Enclosure is the premium freestanding option with a 2" EMT frame system and more flexibility for mounting projectors, launch monitors, lighting, and other accessories.
What is the difference between a freestanding enclosure and a Built-In Golf Room Kit?
A freestanding enclosure sits inside your room using a frame, impact screen, and enclosure material. Carl’s Built-In Golf Room Kit uses the room itself as part of the simulator setup, with the screen anchored to the corners and protection planned around the walls and ceiling. Freestanding is usually better for flexibility. Built-In is better when you want the cleanest, most room-integrated look.
Why choose Carl’s Place golf simulator enclosures?
Carl’s Place enclosures are built with the details that matter in an indoor golf space: durable impact screen options, protective enclosure materials, sturdy frame systems, reliable fittings, thoughtful safety add-ons, and custom sizing options. Whether you choose DIY, Pro, Curved, or Built-In, the goal is the same: a simulator space that looks more polished, protects the room better, and feels built for indoor golf.
Build the Golf Simulator Enclosure That Fits Your Room
The right enclosure does not start with the product. It starts with the room.
Measure the space, think through how permanent you want the setup to be, decide how finished you want it to look, and be honest about how much DIY you actually want in your DIY. Then choose the enclosure that fits.
Ready to see what works in your space? Use Carl’s Build Your Own Golf Simulator tool, shop all golf simulator enclosures, or get help from our expert team.
Search articles by tag:
Resources Golf EnclosuresRelated Posts

Golf Simulators, Golf Enclosures
Customer Spotlight: Fairways of Woodside
Golf Impact Screens, DIY Golf Enclosures, Golf Simulators, Resources
Customer Feature: Dennis Miller’s DIY Golf Simulator

Golf Impact Screens
Customer Spotlight: Fairways of Woodside Reviews Golf Enclosures