Daniel “DJ” Johnson, who is an Arizona native in his mid-30s, has been golfing for about 10 years.
(For a long time) I’ve wanted to put a simulator inside,” DJ said. “I’m married with kids, so it was kind of hard to convince my wife to put a massive thing in our home.
He started golfing at home with a collapsible net and FlightScope Mevo in his backyard. He quickly upgraded to the Mevo+ and then wanted to move it indoors due to the months of hot weather in his home state.

“I would find myself at the PGA store a lot and using their simulator,” DJ said. “I was just like, ‘I gotta get one of these in my house.’ I tried to convince my wife and showed her pictures … a lot of people’s setups just aren’t really a good selling point. They look like dungeons, in some dark room or garage.”
That’s when the lightbulb turned on.
“Why can’t this be something that can appeal to and be fun for families?” DJ wondered. “If it’s done right, you can do it clean and make it multipurpose, making it a theater room so now you’re not wasting a whole room for golf. Now you have this room you can throw movies on or hook up a Nintendo for your kids when they have sleepovers.”
So that’s what he did. Now his wife and kids love it, and he’s even gotten his kids to enjoy golfing in the simulator, and not just watching movies and playing video games.

“In that room, we used to have a pool table and a bar, and then I never really played pool,” DJ said. “People would come over and just kind of sit on the pool table and nobody really did anything. I think it’s better this way because you’re actually moving around and doing something active.”
DJ first tried a golf simulator enclosure kit from another supplier. He liked the idea of having the built-in buffer between the screen and the wall where he anticipated placing the enclosure. But as he was assembling the enclosure, he realized something.
“I had these tent poles that pop together, and they were super flimsy. I got it like halfway put up, and it was already kind of wobbling … I didn’t put the screen on and I was like, ‘This isn’t it, this isn’t what I’m looking for,’” DJ said. “So I had a nook in my house and I know someone said that Carl’s Place can custom make them, but I was worried it was going to be super expensive and take forever.”
Zach, a Carl’s Place Customer Service Representative, spoke with DJ.
“(Zach) was super helpful and top notch,” DJ said. “He was like, ‘Yeah, we can design this. Just tell us exactly what dimensions you want and we’ll get it done for you.’”
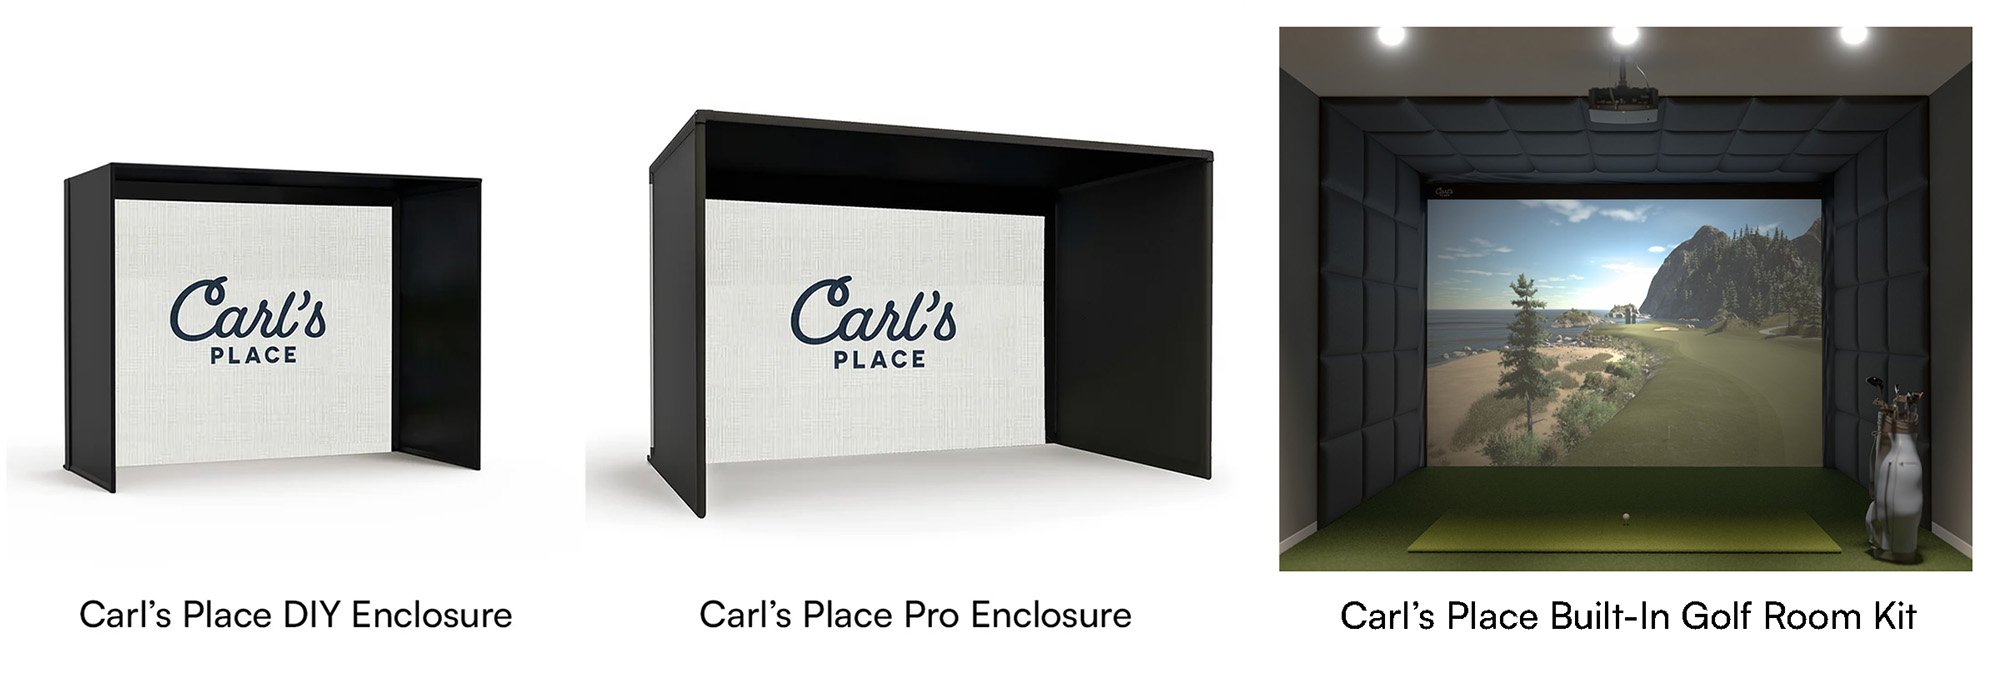
DJ ended up with a Carl’s Place custom made DIY golf simulator enclosure and Premium impact screen, while also adding on foam inserts and side nets to protect the enclosure, house and golfer from errant shots. He sourced his own EMT from Home Depot.
It was less than a week and I had the enclosure from Carl’s Place. It was crazy.
“It’s way sturdier, the screen looks nicer. My 11-year-old, she hits it pretty hard, and she’s hit some inside heel shots and put it straight into the net and that thing has caught it. No damage yet.”
DJ said the assembly process for his Carl’s Place DIY golf simulator enclosure was “extremely easy, super straightforward.”
“That’s another issue I ran into when I started to assemble the other golf enclosure. Their instructions are … two guys in a video, but they have different length pipes and they don’t show any indication of which ones go in where,” DJ said.
CARL’S TIP: Carl’s Place sells a pipe framing kit for the DIY golf simulator enclosure if you don’t want to source your own EMT.
So far, DJ loves his Premium screen for several reasons, including the ability to adjust the tension with the ball bungees that attach the screen to the frame, and that golf ball impact dents don’t seem to last like they do on other impact screens.
“Some of the other screens, you’ll see a guy hit on video and it will put a dent in there, and then hit another spot and it will put a dent in there, and a different spot and a dent there. Then you see all three of them,” DJ said. “With (the Premium impact screen from Carl’s Place), it will put a dent, but when you hit another location, it’s like it pulls the previous dent out and now you only have one dent there.
“When I’m all done, I just go up to it and give it little taps around and it’s like perfect again.”
DJ has owned many different launch monitors. He said he is impressed with the accuracy of the Mevo+, which was the first launch monitor he used.
“Focusing on spin, launch angle, carry and shot shape … seeing how close they were, I was like, ‘There’s no need for me to spend any more money right now,’” DJ said. “Mevo+ has a lot to offer if you have the space and have it set up correctly.”
Overall, DJ said he would strongly recommend buying home golf simulator equipment from Carl’s Place.
I think the design (of the DIY enclosure) is perfect,” DJ said. “It’s like future-proof. If I didn’t add all the safety features on like the side net and foam … all the nuts and bolts are still there for it. Let’s say you just want to get going with a cheaper screen and decide you really like it and are getting into it, and now you have a little more money, you can add the premium screen to it, side nets, things like that.
“It gives the option for someone to get in at entry level and have room for expansion.”
Watch and listen to DJ talk about what he bought from Carl's Place in the video below!
...One-Year Follow-Up: How DJ’s Golf Simulator Held Up
In a one-year follow-up, DJ checked back in on how his Carl’s Place DIY Enclosure and Premium Impact Screen were holding up. Short version: the room was getting used. A lot.
What started as an unused billiard room had turned into a golf simulator, movie room, sports-watching room and kid-approved hangout. Which is pretty much the dream if you’re trying to convince the whole house that a golf simulator is not just a giant toy for one person. Even if, technically, it is a little bit that too.
We use that room a lot more than we did before when it was a billiard room,” DJ said. “... (A golf simulator room) is something that more households should have. Some people just have sitting rooms in their house that I’ve never sat in with them and I’ve never seen them used. It’s kind of like, ‘Why waste that space when you could turn it into something that is truly fun for everybody?’
At the time of the follow-up, DJ said he was using the simulator three or four times a week for golf, but closer to five times a week or even daily when movie nights, sports, games and time with his kids were included.
We’ve used it for plenty of movie nights,” DJ said. “We used it to watch The Masters, basketball games, football games. I find myself in there quite a bit. I may be using it three or four times a week for golf, but closer to five or even daily with my kids.
What DJ Upgraded After the First Year
Like most golf simulator owners, DJ did not build the room once and then never touch it again. That would be too easy. Over the next year, he made a few changes and upgrades, including:
- Adding a Bushnell Launch Pro to his launch monitor lineup
- Starting to use GSPro golf simulator software
- Creating his own hitting strip
- Finding a screen-tension setup that kept the image looking good while reducing bounceback
- Considering a 4K projector upgrade to make GSPro look even better
But the biggest pieces of the setup did not change much. According to DJ, the Carl’s Place DIY Enclosure and Premium Impact Screen were still the “stars of the show.”
How the Impact Screen Held Up
DJ said the enclosure and screen held up well after a year of regular use. His biggest advice was not complicated: use quality golf balls, keep your golf balls clean and make sure clubs are clean before people start hitting into the screen.
“(They’ve) held up really well,” DJ said. “You definitely want to make sure people are using quality balls … Make sure (your friends) clean their clubs and aren’t just smashing mud onto the ball and onto the screen … I clean my balls and clubs after every (outdoor) round.”
He noticed a few burn marks on the screen, but said he had to get close to see them and that they were not visible with the projector on.
Carl’s Tip: A little screen care goes a long way. Keep clubs and balls clean, use quality golf balls and check out our guide on how to clean your golf impact screen if your setup is getting regular use.
How the Simulator Helped His Golf Game
The simulator did not just make the room more useful. DJ said it helped his actual golf game too.
“My ability to shape the ball has improved drastically,” DJ said. “I also get to practice shots I typically can’t on the range, like putting myself behind a tree and learning how to hit low and under, or get the ball to curve around it.”
He also said simulator practice helped him learn different clubs and shot types for the same distance instead of always defaulting to one shot.
DJ also used swing video to work with a coach remotely. If you want to record your swing for your own review or send it to an instructor, Carl’s Place Swing Cameras can help make that easier.
DJ’s Advice After the First Year
After the first year with the room, DJ had a few practical tips for people building their first simulator:
- Get a strong computer. DJ said he was glad he bought an “overkill laptop” because it handled everything he threw at it.
- Think carefully about the projector. He liked his Optoma GT1090HDR, but said he tested it next to the Optoma GT1080HDR and did not see enough of a difference to justify the extra cost.
- Consider turf over puzzle gym mats. DJ said it made financial sense compared to some larger mat options.
- Do not overthink launch monitor data. DJ said he learned that too much data can make you overthink the game, and that basics like launch angle, spin and carry can be plenty useful.
The lesson: a home golf simulator does not have to stay exactly the same forever. Start with a solid enclosure and screen, make the room useful for more than golf, and improve pieces over time as you learn what you actually care about.
Search articles by tag:
Golf Impact Screens DIY Golf Enclosures Golf Simulators ResourcesRelated Posts
Golf Simulators, Golf Enclosures
Customer Spotlight: Fairways of Woodside

Golf Impact Screens
Customer Spotlight: Fairways of Woodside Reviews Golf Enclosures
Resources, Golf Enclosures
Find the Type of Golf Simulator Enclosure That Fits Your Room