You called, we picked up. You chatted or emailed, we didn't leave you on hold. Of all your top golf simulator questions these are the most frequently asked.

If there is one thing we’ve learned over the years in the golf simulator industry, it’s that indoor golfers are crazy curious about every detail.
We understand that is for good reason; installing a golf simulator at home or in a commercial location can be a huge up-front investment, but it will pay off in the long run. And we enjoy answering your questions to help make your indoor golfing dream a reality.
We’ve narrowed down a long list into the top golf simulator questions for 2026 at Carl’s Place. We will answer those questions and provide other resources for you below.
8 MOST POPULAR QUESTIONS ABOUT GOLF SIMULATORS
WHAT ARE THE DIFFERENCES BETWEEN THE ENCLOSURES OFFERED AT CARL’S PLACE?
DIY vs. PRO
Although the freestanding DIY and Pro enclosures look similar in photos - both are surrounded by black enclosure material, accompanied by a white (or gray) impact screen, use ball bungees and zip ties, and are constructed with EMT piping (DIY uses 1-inch EMT and the Pro uses 2-inch EMT) - you can see and feel the difference in real life.
See it’s actually more simple than you think. It really comes down to size, feel and budget.
This more detailed comparison will help you decide which golf simulator enclosure would be best for your specific area. Our DIY and Pro assembly videos will also help you understand the differences!
Built-In
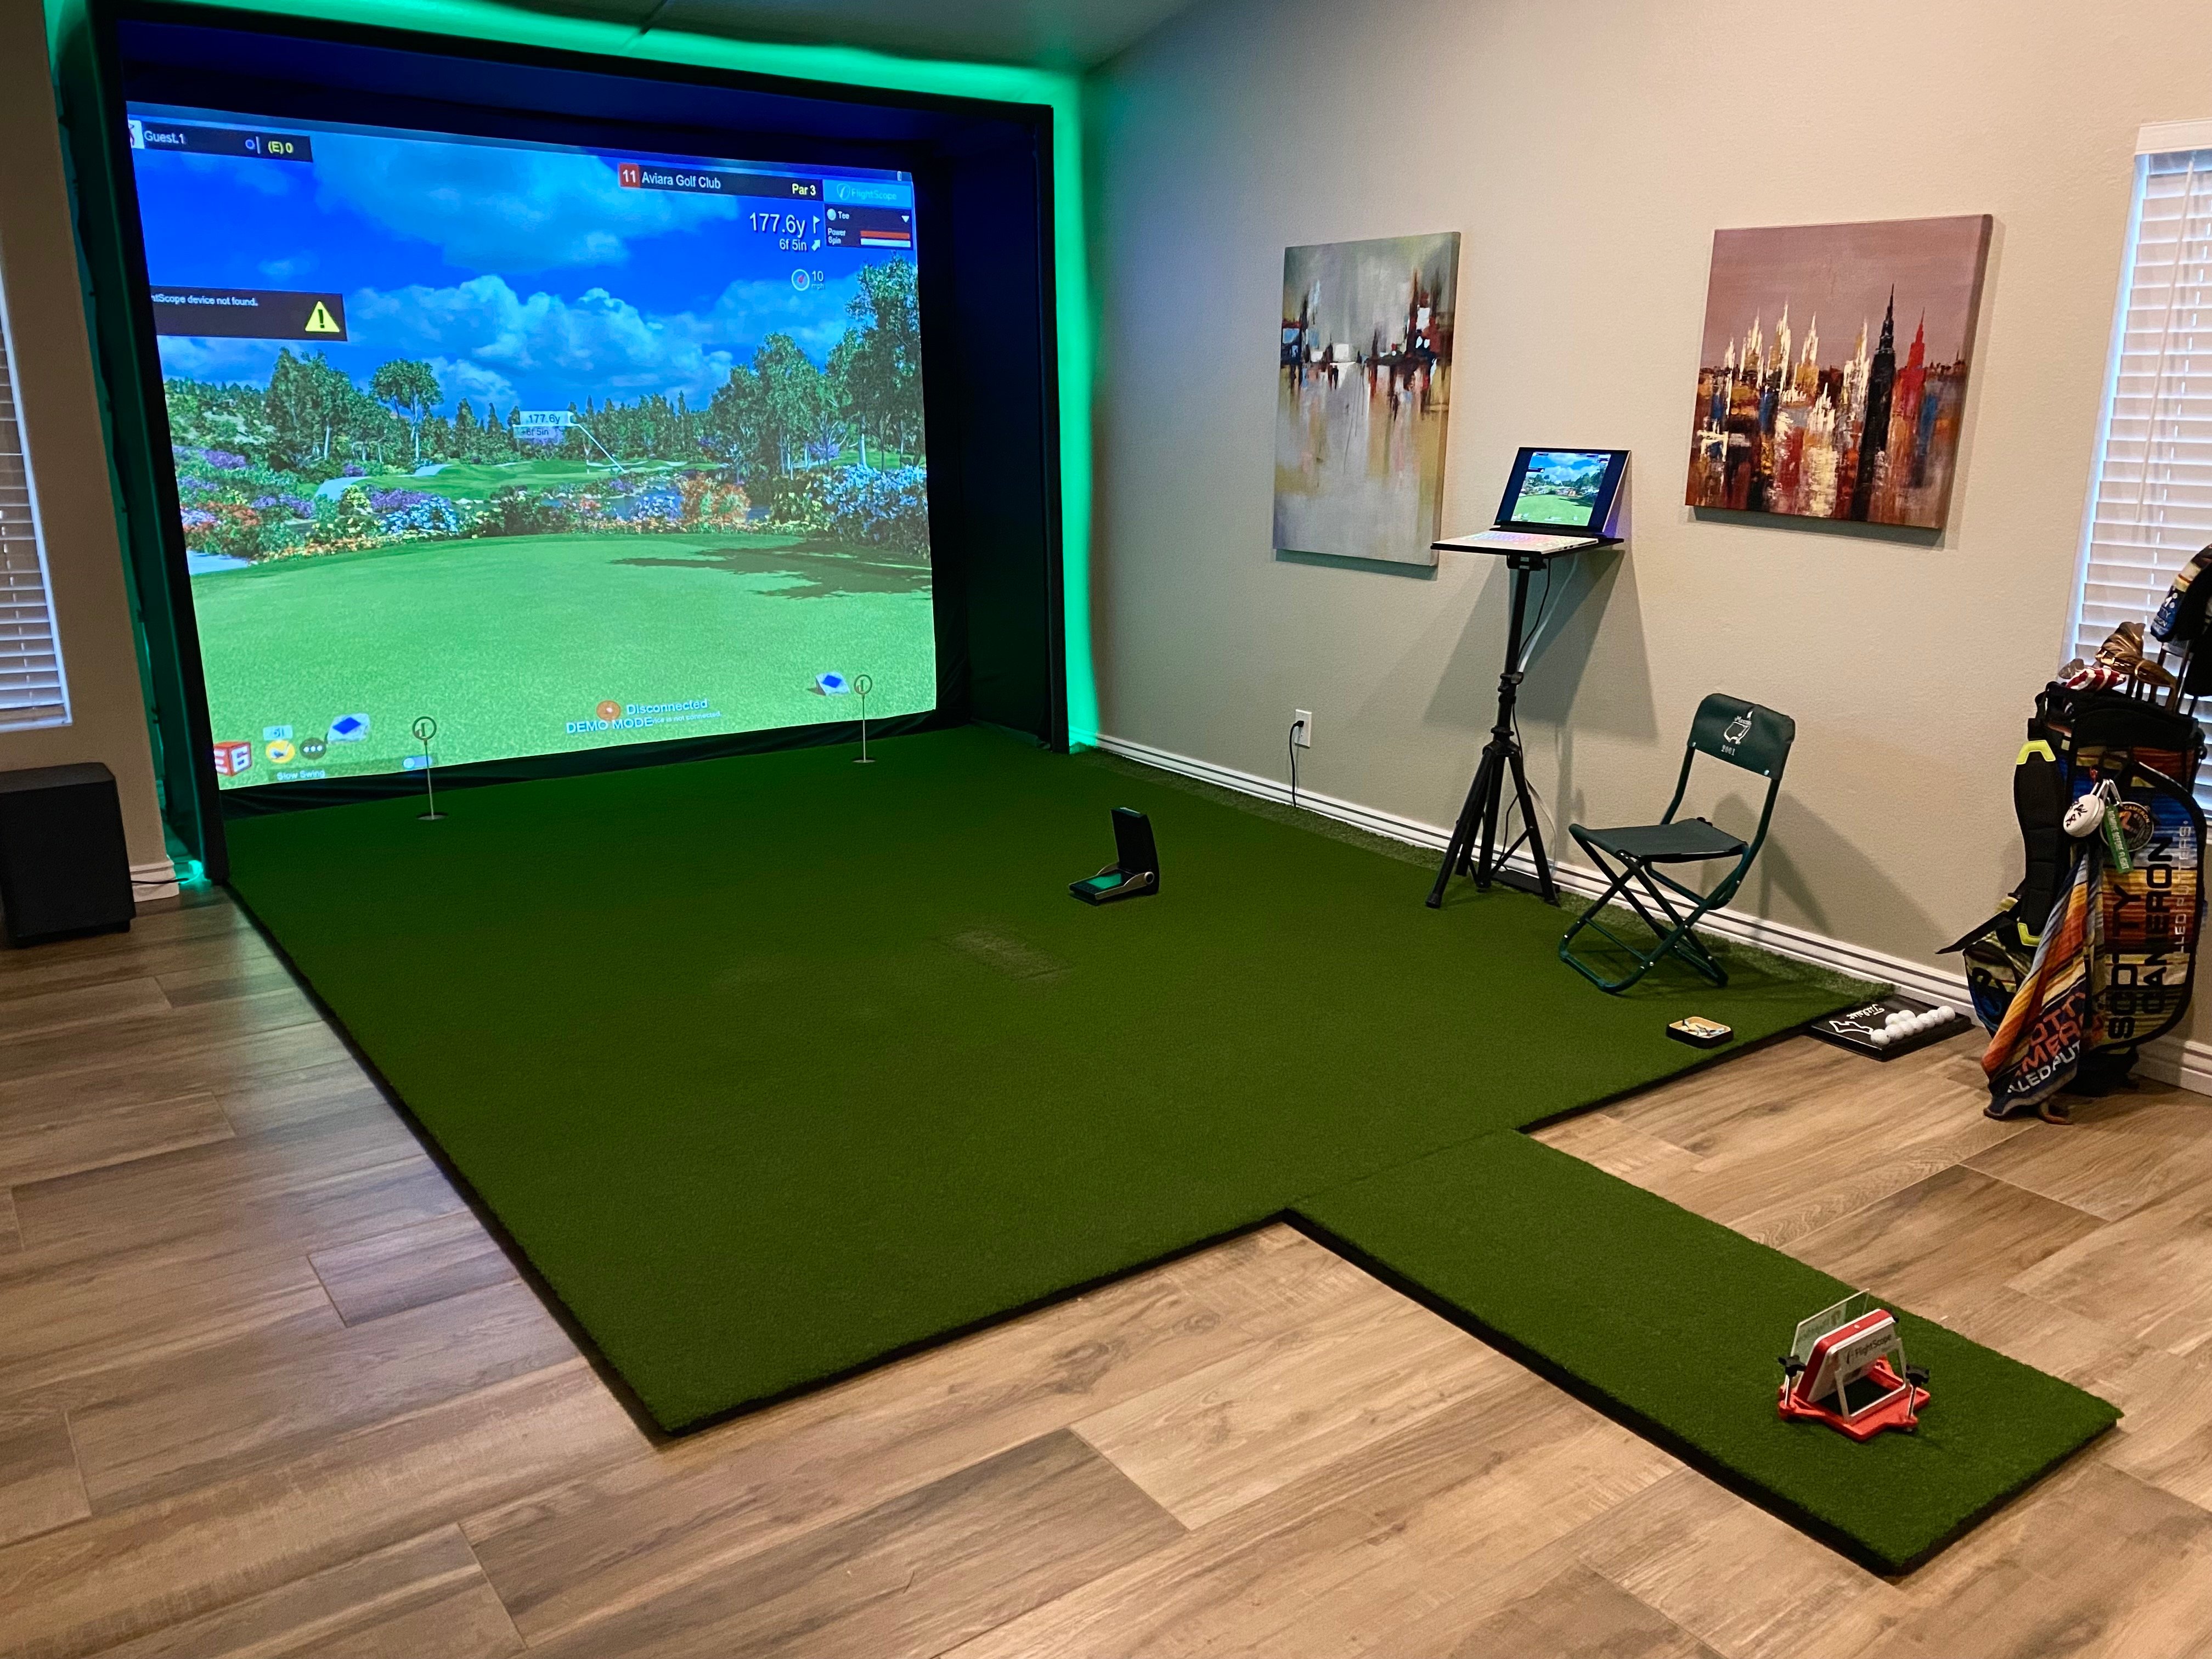
Carl’s Built-In Golf Room Kit transforms nearly any room into an immersive golf simulator. Perfect for home or commercial use, this kit creates a fully immersive experience with a seamless turf-to-screen visual, thanks to its borderless design that lets your turf flow right up to the impact screen.
The kit starts with the built-in impact screen and mounting kit, with blackout panels and mounting hardware as an optional add-on.
This kit is ideal for those with carpentry or handyman skills. Crafting a polished, professional-looking setup takes time and effort. It’s designed for spaces with straight, even 2x4 wood-framed walls, free of trim boards. For the smoothest installation, consider using plywood on walls and ceilings. If your space doesn’t fit these specs, you’ll need to make adjustments to match your unique setup.
Check out the built-in screen and wall panel installation videos to see the built-in kit in action.
WHAT IS THE DIFFERENCE BETWEEN CARL’S PLACE GOLF IMPACT SCREEN MATERIALS?
Carl offers three versions of impact screens: Standard, Preferred and Premium. All three can be custom sized and custom finished (in 125 different ways!), and the Premium can be white or gray.
-
Premium is Carl’s top and most popular option; it has three layers that help make it the most durable and quietest screen, while the top layer is the smoothest and tightest woven for the best projected image quality.
-
Preferred is the mid-level option at Carl’s Place. It’s not as harsh on your wallet as the Premium, but is still a durable screen with great image quality.
-
The Standard is a budget friendly, entry-level option.
Tim, a product specialist at Carl’s Place, explains in more detail the differences between the three screens.
WHAT ARE THE DIFFERENCES BETWEEN THE DIFFERENT SCREEN FINISHES?
Some of you are probably wondering: what even is a “screen finish”? It’s the edging around the white part of the impact screen.
We have three standard finishing options when you order just an impact screen: classic, classic with flaps and the classic with loop fastener. However, we can custom finish a screen in a combination of 125 different ways.
The three standard finishing options include a 2.5-inch vinyl edge with grommets, which act as the mounting points using ball bungees or zip ties that can attach to a frame.
If you order just a screen with flaps, those include a 7-inch nylon flap with a strip of loop fastener that can attach to a strip of hook fastener on your enclosure, walls of your golf room, etc.
The classic with loop fastener strips includes a 1-inch strip of loop fastener around the entire screen. These were typically used in Carl's original Pro Golf Enclosures where foam cushions surround the screen and attach to the loop fastener. Note that the screens that now come with Pro Enclosures will have flaps attached.
If you order a screen that comes with an enclosure, that screen will be finished a bit different. The top and sides come with 8.25-inch flaps, but the bottom goes all the way to the floor so users can get that seamless turf-to-screen immersive feel. The bottom has a sleeve in where a cable runs through from one side of the enclosure frame to the other so that balls don't slip underneath.
Check out our video explaining the differences between the screen finishes.
However, if those standard finishes don’t work the best in your setup, Carl does offer custom finishing.
IF I’M JUST ORDERING AN IMPACT SCREEN FROM CARL’S PLACE, HOW SHOULD I BUILD A FRAME TO MOUNT IT?
The easiest and least stressful answer for how to install a golf impact screen is to buy a golf enclosure kit. We will design it for you so that you have an easy assembly following our detailed instructions. However, if you want to design your own solution, you have several other options.
Some customers will just hang their impact screen in a garage or large storage building, while others might put together a hitting cage to hang the screen. It will likely require some trial and error no matter how you want to do it.
Just be sure to hang it so it is flat for a high quality projected image, but not too tight to avoid fast ball bounce back.
Typically, we suggest making your frame no more than 2 inches taller or wider on each side than the screen you plan to order. This means your frame should not be more than a total of 4 inches taller or wider than your screen. If you already have a mounting solution, we can customize a screen to that size, making it as taut or loose as you would like.
DO I NEED THE PIPE FRAMING KIT FROM CARL?
Absolutely not. But, you will need pipes, strong ones (in fact we’ll tell you exactly the right pipes!) to set up your golf enclosure, but Carl will never force you to buy pipes from him. Sourcing your own pipes locally is more cost effective.
However, if convenience is worth it to you, we can provide standard pipe framing kits or customize a pipe kit to your needs. Custom orders need to be placed through our customer service team or via our Build Your Own Golf Simulator Tool.
WHAT ABOUT FOAM INSERTS FOR GOLF SIMULATORS?
Foam inserts for golf simulators are not necessary, but certainly recommended. You’ll understand why once you hit an errant shot that connects with your pipe frame on the side of your impact screen.
The foam inserts go behind the flaps on your impact screen and get placed up against the frame of the screen/enclosure. They protect you from ricocheting balls, but also keep your frame and balls from getting dinged up.
Customers have tried using alternative solutions such as gutter foam for this purpose, but our foam is a tried soft-and-safe solution.
WHAT ARE THE MOST IMPORTANT FACTORS TO CONSIDER WHEN LOOKING AT PROJECTORS?
Projectors can be super overwhelming, but three of the top factors to consider would be your intended aspect ratio, throw distance and budget.
Aspect ratio deals with the shape of your projected image. The key is that you will want your projected image to fit the shape of your golf impact screen so the image can fill the screen and provide you the best experience. It is not necessary, but makes your setup look much cleaner and more professional.
Throw distance is where you need to place your projector to fill your golf impact screen. Our screen size calculator can help you with this and other details.
Check out our in-depth article on how to choose a golf simulator projector for all the details you’ll ever need.
HOW DO I CLEAN MY IMPACT SCREEN AND MAKE IT LAST A LONG TIME?
So glad you asked. We have a more in-depth blog written on that topic, but we will summarize most of it in a couple sentences below.
To clean your impact screen, we've found the best ways to be using soap and water, a Tide-To-Go Stain Remover Pen, LA's Totally Awesome All Purpose Cleaner, and a portable carpet cleaner. However, you'll want to be careful with whatever route you choose as overdoing any of these could leave screen damage.
There are many ways to help your screen live a longer life, but keeping it clean and installing it properly are at the top of the list. Other factors that contribute to your screen's life include the screen material you chose, the amount it is used and the ability/frequency of the users.

Search articles by tag:
Golf Impact Screens Golf Simulators ProjectorsRelated Posts
Golf Impact Screens, DIY Golf Enclosures, Golf Simulators, Resources
Customer Feature: Daniel “DJ” Johnson’s DIY Golf Simulator

Golf Simulators, Golf Enclosures
Golf Simulator Speakers: What To Get And Where To Mount Them
Golf Impact Screens
Customer Spotlight: Fairways of Woodside Reviews Golf Enclosures