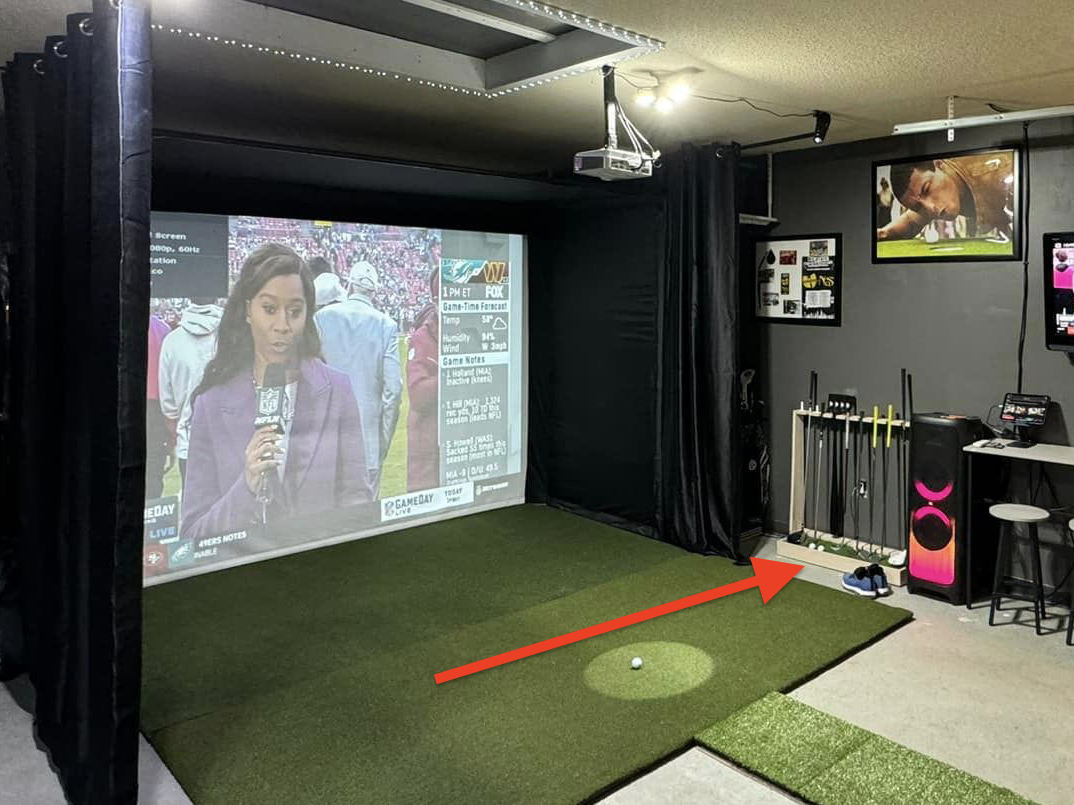
Tired of your golf clubs making a mess in your home golf simulator setup? Get rid of the chaos and organize your space with a golf club rack for your home golf simulator.
In this post, we'll walk you through how to create a DIY golf club rack to neatly store and show off your clubs. No more digging through a jumble of clubs to find the right one – with a personalized golf club storage rack, everything will have its place.
Let's jump into the materials you'll need and the steps to design, build, and customize your very own golf club rack. Get ready to level up your home golf simulator setup with some practical solutions.
HOW TO BUILD A DIY GOLF CLUB RACK
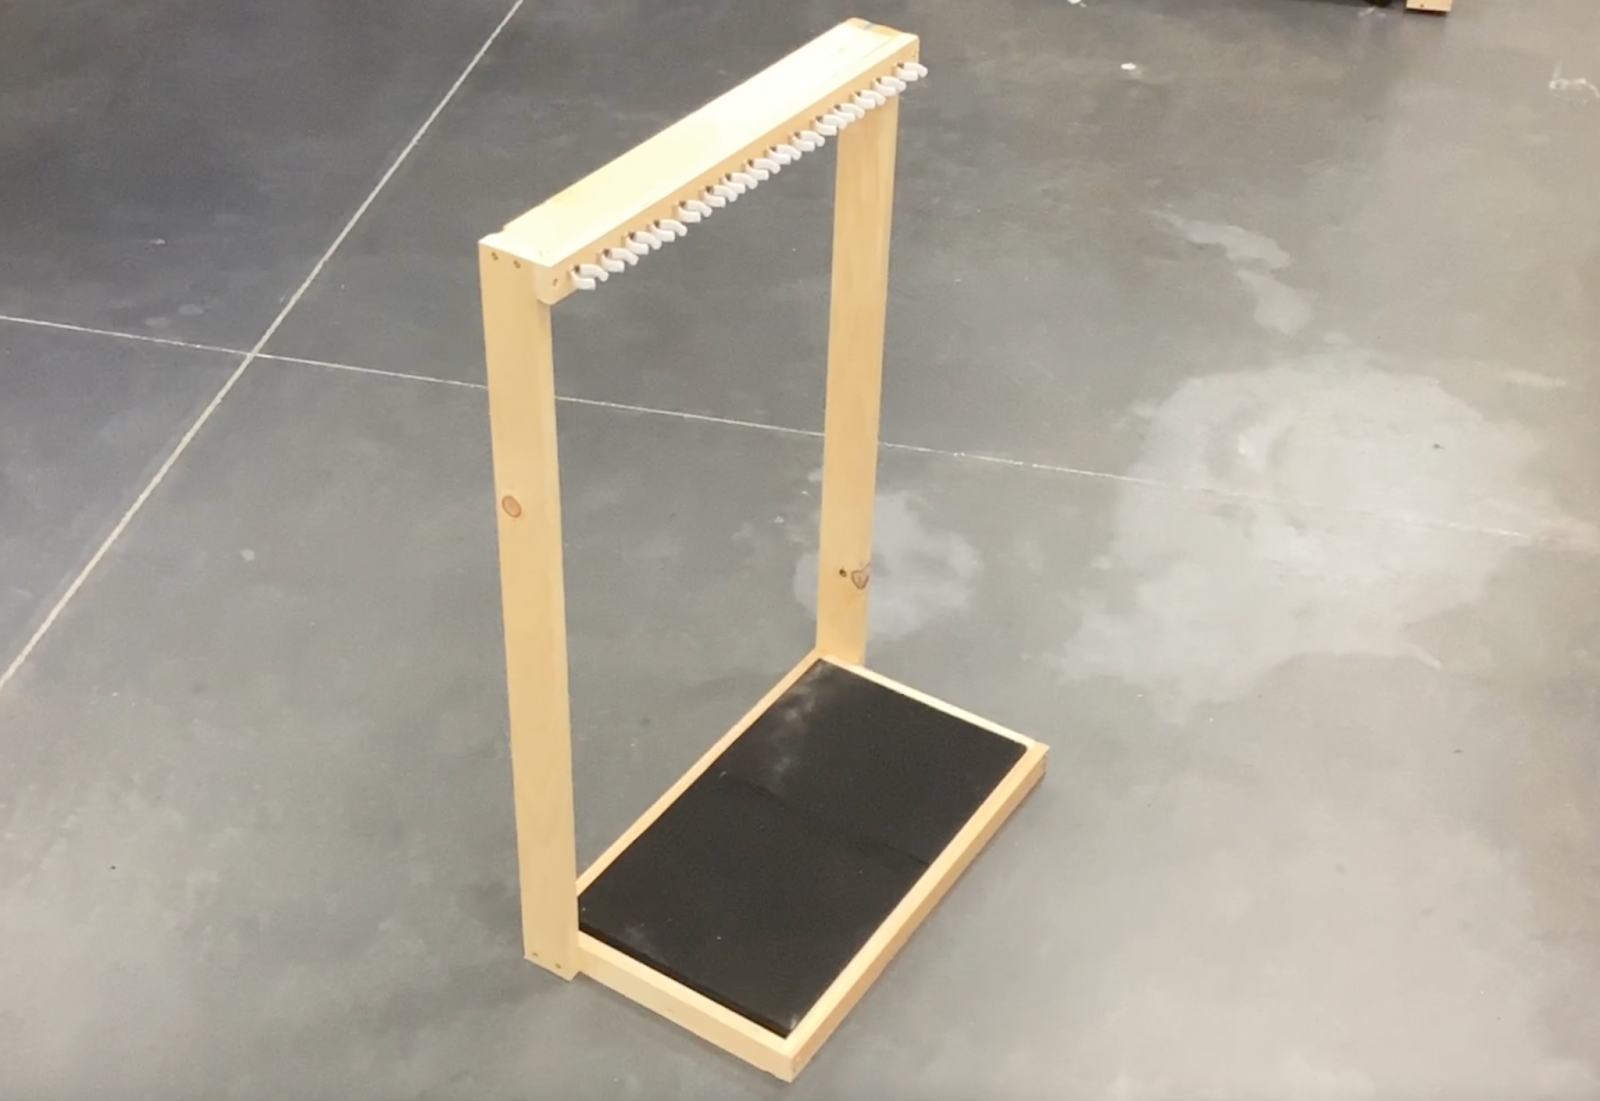
There are dozens of different options when it comes to making your own golf club rack, and the quick one we made in Carl’s shop is just one of the more simple options.
Materials Needed:
- Pine wood: 1" x2" and 1" x 3"
- Screws
- Power drill and screwdriver with proper bits
- Jesled Clips Holder Brackets (available on Amazon)
- Optional: countersink bits
- Optional: sandpaper, stain, or paint
- Optional: pad or turf for the base
Construction Steps
Stain or Paint
For a custom look, consider sanding, staining, or painting your rack to your liking before constructing.
Frame the Base

Cut Wood: Slice your 1" x 2" wood into two 24” lengths for the width and two 12” lengths for the depth.
Assemble: Lay the depth pieces inside the width pieces to form a rectangle.
Secure: Predrill holes at each corner to avoid splitting the wood. Screw the pieces together. Optionally, countersink the screws for a flush finish.
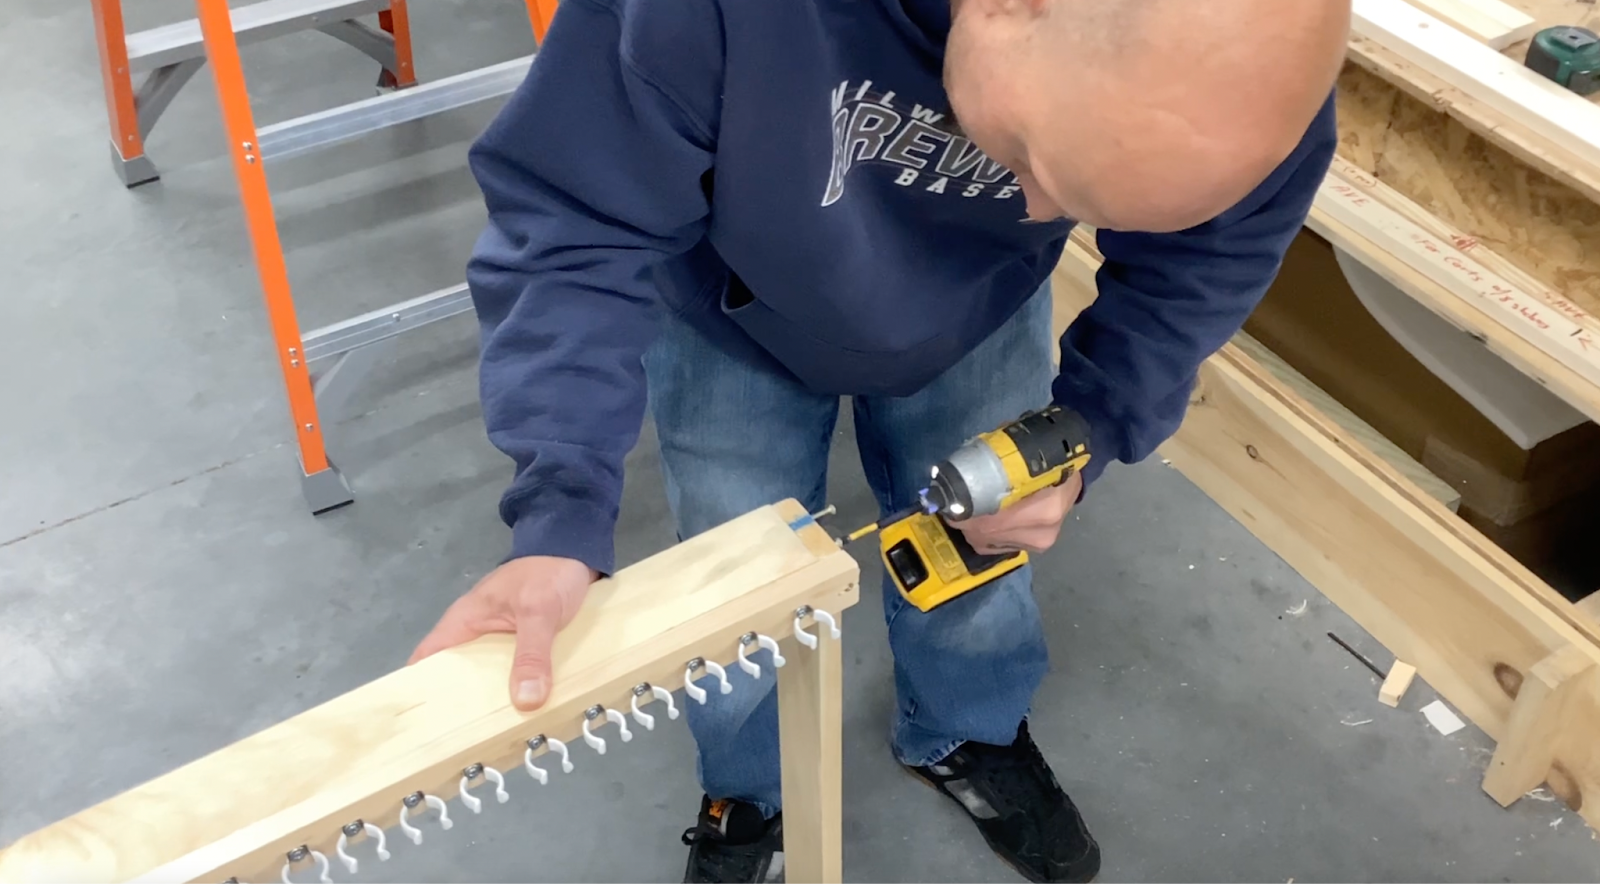
Build the Uprights

Cut Wood: From your 1" x 3" wood, cut two pieces each 3' tall.
Attach to Base: Predrill the bottom of these uprights, countersink if you like, and attach them to the back corners of your base frame with screws.
Top Connector
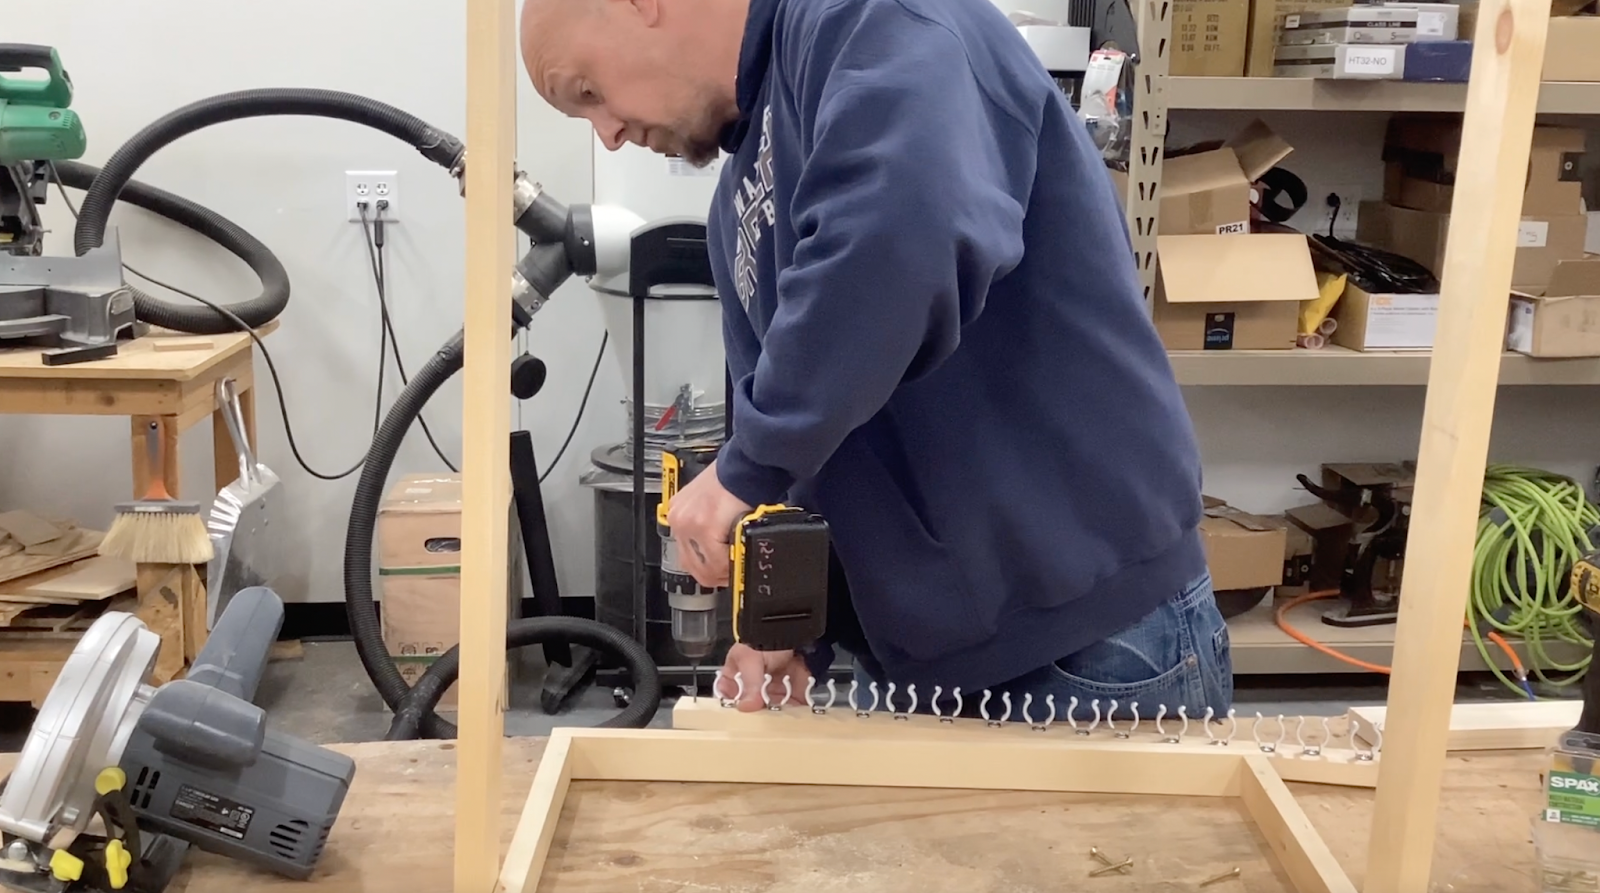
Prepare the Connector: Cut a 1" x 2" wood piece to 26”.
Attach Hooks: Add Jesled Clips (found on Amazon) to hold the club shafts. Start 1 inch from the edge and space them every 1.5 inches. Adjust as needed for more than 14 clubs.
Mount: Predrill and optionally countersink the ends of this top piece, then attach it to the top of the uprights using screws.
Finish The Top
Cut and Attach: Saw off another 1" x 2" board to 24”. Predrill the top of the uprights and secure this finishing board with screws.
Base Padding
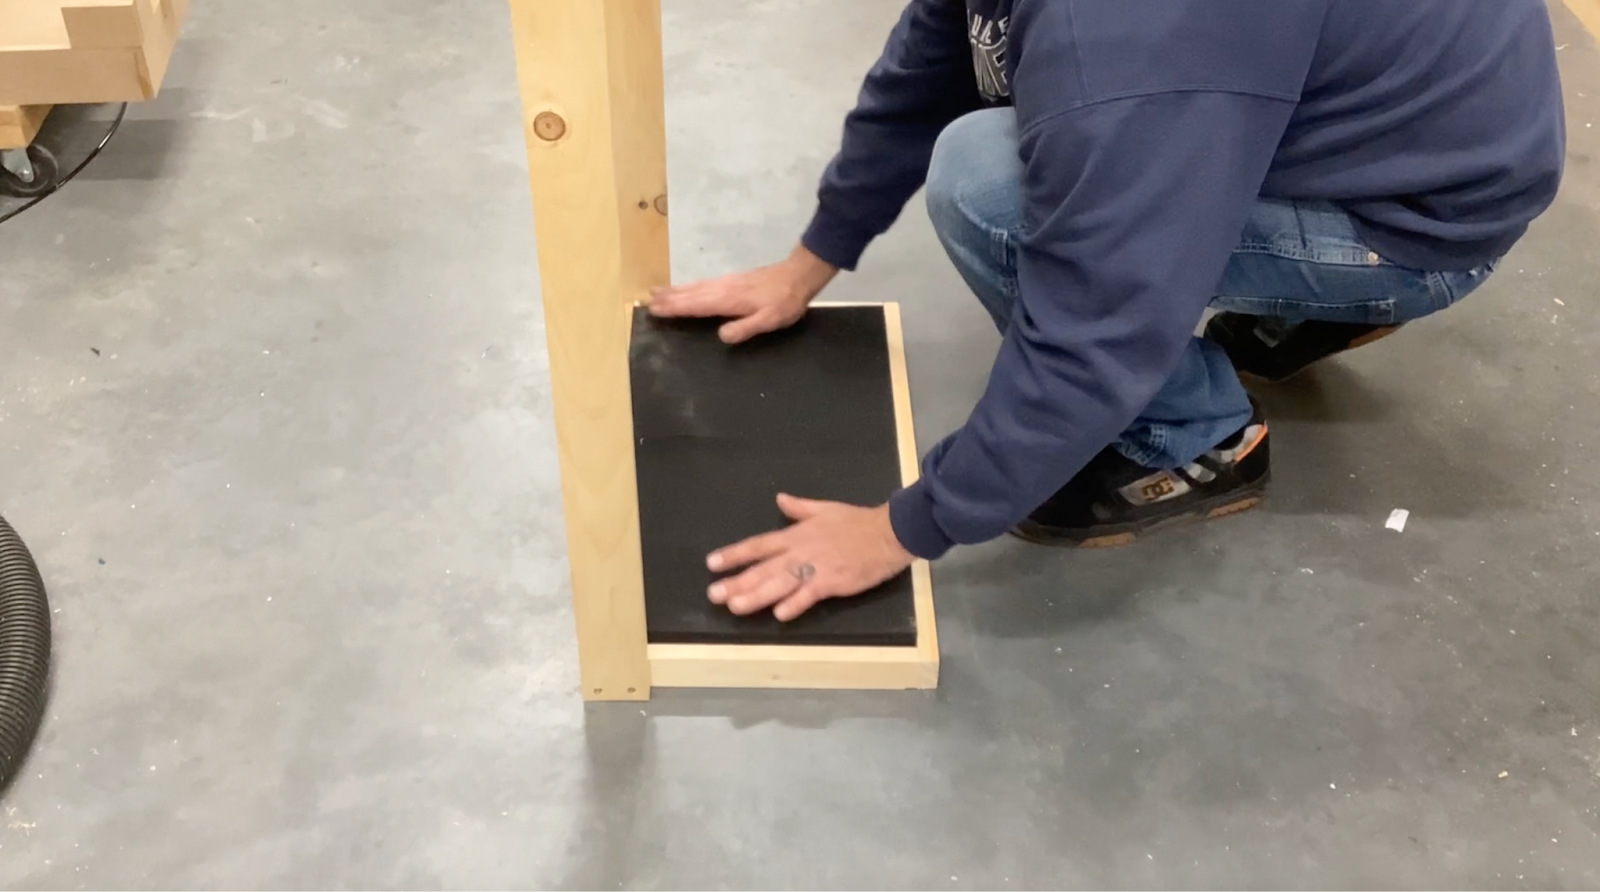
Insert Padding: Place a protective pad or turf inside the base frame to cushion your clubs and keep them in prime condition.
You're Finished!
Now, not only do you have a custom solution to store your golf clubs, but you've also got a fun weekend project that might just be as satisfying as a perfect drive.
OTHER GOLF CLUB RACK OPTIONS
Metal Frame Golf Club Rack
Materials needed:
- Metal rods or pipes
- Metal connectors (such as corner brackets or T-connectors)
- Screws or welding equipment
- Hooks or holders for golf clubs
Tools needed:
- Saw (if cutting metal rods)
- Drill (if using screws)
- Welding equipment (if welding)
Begin by cutting the metal rods or pipes to the specified lengths: two pieces at 36 inches for the vertical supports, three pieces at 18 inches for the horizontal shelves, two pieces at 18 inches for the base supports, and one piece at 36 inches for the base crosspiece.
Utilize metal connectors to join the metal rods together, forming the frame of the rack. Connect the vertical supports to the base supports using T-connectors or corner brackets.
Securely attach the horizontal shelves to the vertical supports, ensuring they are evenly spaced apart. Use metal connectors to secure the shelves in place.
Depending on the connectors used, reinforce connections with screws or welding. If screws are used, pre-drill holes and insert them to secure connectors to the metal rods.
Attach the 18-inch base supports horizontally between the two vertical supports at the bottom of the rack. Secure them using metal connectors. Install the 36-inch base crosspiece horizontally between the two base supports, ensuring it is centered and level. Secure it in place with metal connectors or welding.
Evenly space hooks or holders for golf clubs on the front-facing side of each shelf. Start approximately 2 inches from the edge of each shelf and space them 6 inches apart. Secure them to the metal rods using screws or welding, ensuring alignment and levelness.
If the rack feels unstable, consider adding additional diagonal bracing between the vertical supports and the base for extra support.

Wall-Mounted Golf Club Rack

Materials needed:
- Wooden plank
- Metal brackets
- Screws
- Hooks or holders for golf clubs
Tools needed:
- Saw
- Drill
- Measuring tape
- Level
Use a saw to cut the wooden plank to the desired dimensions. A common size is 36 inches long, 6 inches wide, and 1 inch thick.
Decide on the desired height for the rack on the wall and mark the positions for the brackets accordingly. Securely attach the metal brackets to the wall using screws, ensuring they are level and firmly mounted. Install one bracket at each end of the wooden plank.
Place the wooden plank on top of the mounted brackets, ensuring it is centered and level. Secure the wooden plank to the brackets by driving screws through the pre-drilled holes in the brackets into the plank.
On the front-facing side of the wooden plank, evenly space hooks or holders for the golf clubs. Securely attach the hooks or holders to the wooden plank using screws, ensuring they are aligned and level.
If desired, enhance the stability of the rack by adding additional screws through the wooden plank into the wall.
CONCLUSION
Building a golf club rack for your golf simulator adds both functionality and aesthetic appeal to your setup.
With the step-by-step instructions provided in this article, you can tailor the design to fit your space and preferences, whether it's a freestanding wooden frame, a sleek metal rack, or a space-saving wall-mounted solution.
Not only does a well-crafted golf club rack keep your equipment organized and easily accessible, but it also enhances the overall look and feel of your simulator area. So, whether you're a seasoned golfer or just starting out, take the time to create a customized rack that reflects your passion for the game and elevates your golfing experience to new heights.
Search articles by tag:
How-To Golf SimulatorsRelated Posts
Golf Simulators, Projectors
Carl’s Place Floor Mounted Projector Enclosure for Golf Simulators
Launch Monitors
NVISAGE NEO-E: A Compact High Performance Launch Monitor

Golf Simulators
Golf Simulators Help Golf Course Transform Banquet Hall