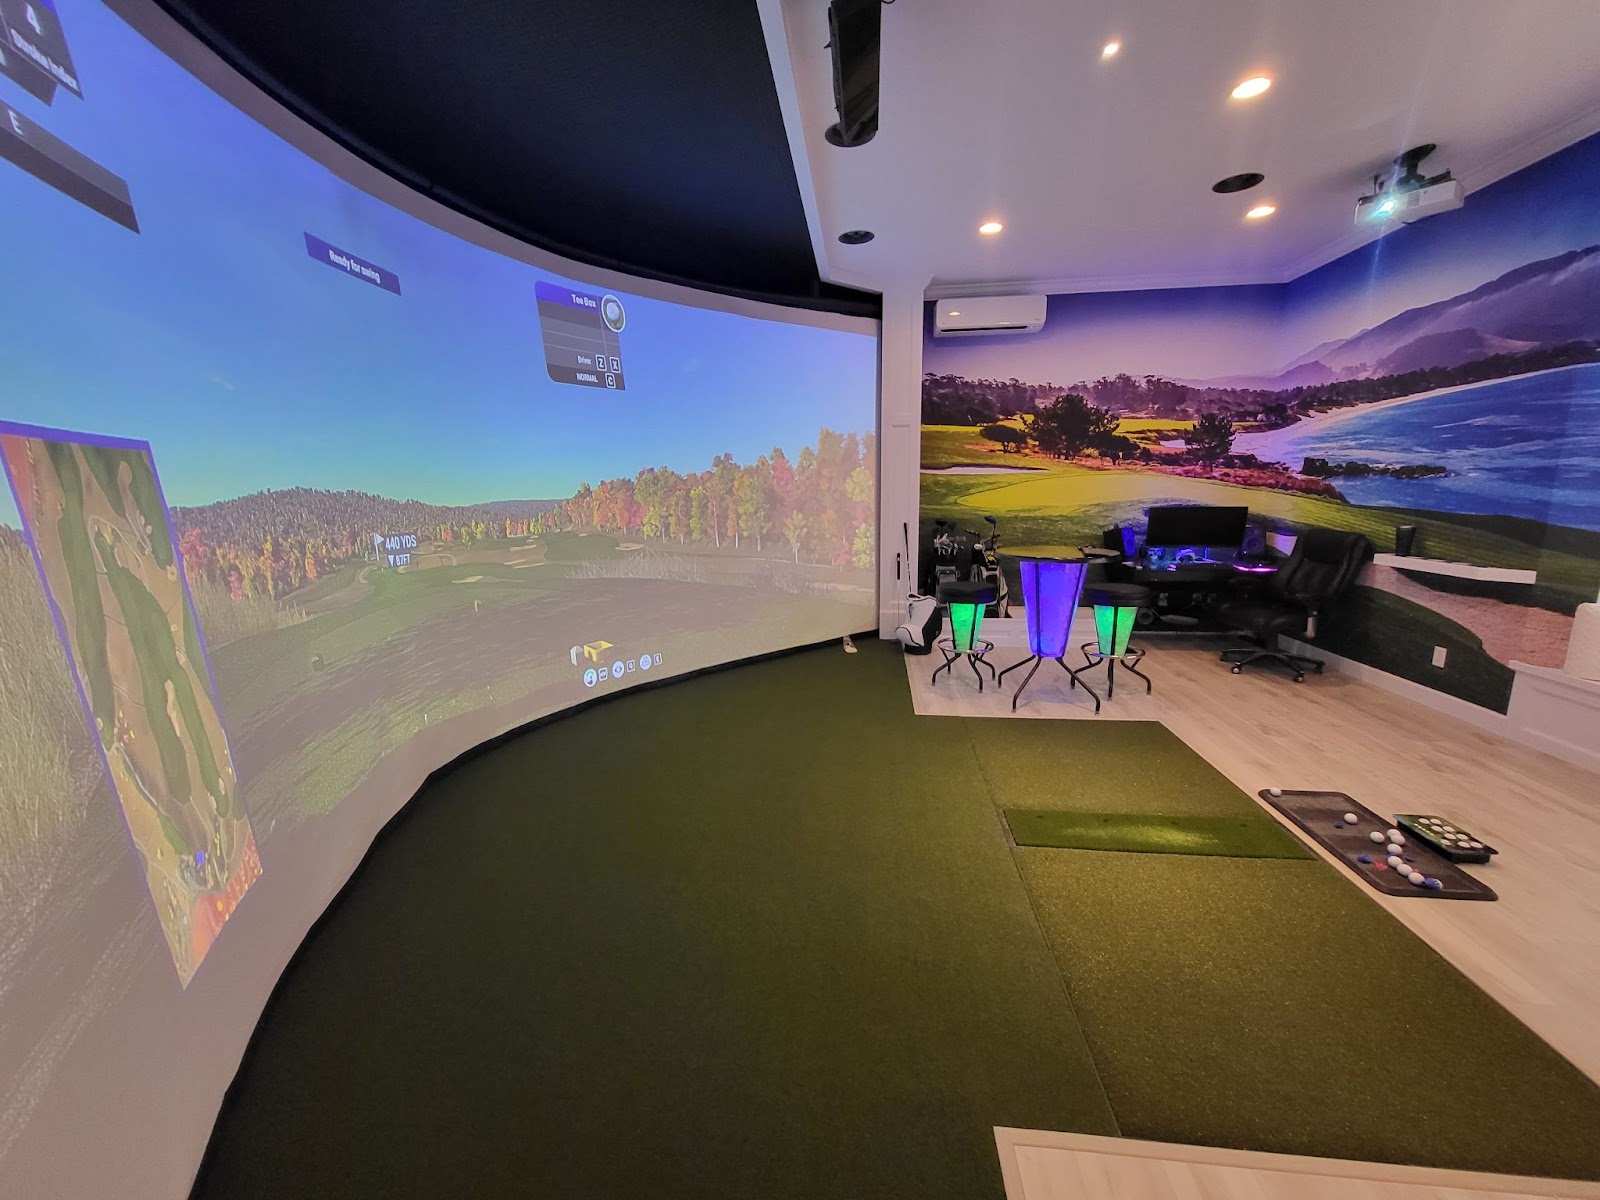
Some golfers just want the ability to take swings at home year round, no matter the weather. Others not only want to practice at home, but also want the most immersive experience possible, which would include a curved golf simulator screen.
A curved impact screen provides several benefits, but also has some factors that need to be considered.
In this blog, we tap into our resident expert Carl - yes, THE Carl - to help walk you through the good and the bad of having a curved golf simulator screen, plus how to get it all set up with one or multiple projectors.
DID YOU KNOW? Carl engineered the first DIY version of a Curved Golf Enclosure.

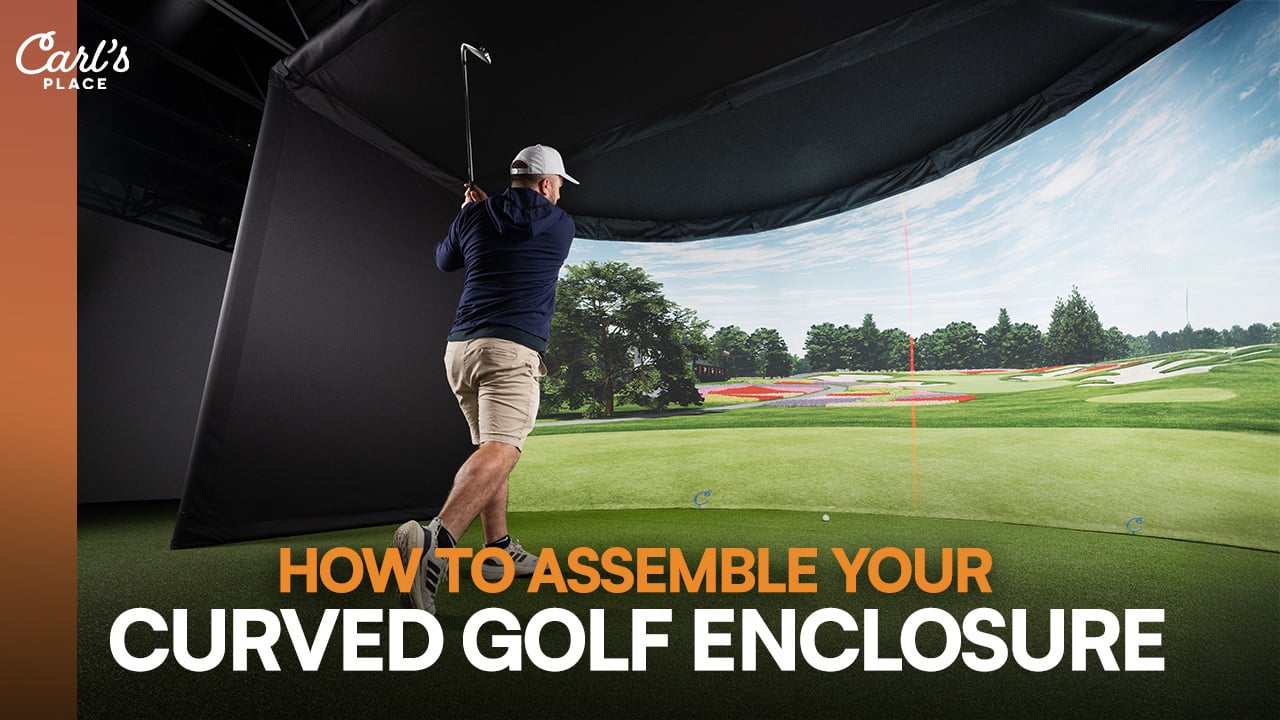
What Is A Curved Golf Simulator Screen?
A curved golf simulator screen refers to a screen used in a golf simulator setup that has a curved shape rather than being flat.
The curve is designed to increase the size of a viewable image in a given space. By curving a screen, the viewer’s eye can be exposed to a larger field of view, increasing the immersion when compared to a flat screen.
Who Should Buy a Curved Golf Simulator Screen?
Curved screens offer indoor golfers a truly immersive and realistic simulation experience, perfect for those who are dedicated to achieving the ultimate in gameplay. While they may come at a higher price point, the investment is well worth it for those who prioritize quality and precision in their virtual golfing setup.
“Curved screens are for indoor golfers who want the absolute best sim experience possible and don't mind spending a few extra bucks to make it a reality,” Carl said. “This is often a great choice in commercial environments where the sim brings an income and the high-end screen can draw in extra customers. Or, it can be the home user who wants to just ‘buy once and cry once’ and know that they've put together the best experience possible.”

Is A Curved Impact Screen Better Than A Flat Screen?
Whether a curved impact screen in a golf simulator is better than a flat one depends on various factors, including personal preference, budget, and the specific setup of the simulator.
Here are some of the pros and cons:
Immersive and Realistic Experience
A curved screen can provide a more immersive experience by wrapping around the player, offering a wider field of view and a sense of being surrounded by the virtual environment. This can enhance the feeling of being on the course.
“The major advantage to a curved screen is that it allows you to increase the immersiveness of the simulator,” Carl said. “One of the major factors that contributes to immersion is the sim user's field of view (FOV). When you're out on the golf course, you obviously have a full 360 degrees of real golf course all around you, about 180 degrees of which you can see at any given moment out of your eyes. When you're watching TV at home, you might only have about 20 degrees of your vision taken up by the TV, whereas at a theater you might have more like 45 degrees.
“In a standard flat-screen sim, this FOV is going to be closer to 65 degrees, but with a curved screen in the same space, you can get that up to 80 or even 100 or more degrees. This has a big impact on the feeling of being surrounded by a golf course.”
The curved shape of the screen can more closely mimic the natural curvature of a golf course, which might make it feel more realistic when playing. It can also help with depth perception, giving a truer sense of distances.

Space Considerations and Cost
To get the most benefit out of a curved screen, they will generally be on the larger side. Curved screen setups also tend to be more expensive due to the size and complexity involved. If space is limited or budget is a concern, a flat screen might be a more practical choice.
“Curved screens are more complicated and more expensive. The benefit of a curved screen is higher for larger spaces, so you want to make sure you have enough space to get a real benefit for the dollars it's going to add to your budget,” Carl said.
Setup and Installation
Curved screens may require more complex installation procedures compared to flat screens. Consider whether you have the technical expertise or resources to properly install and maintain a curved screen.
While a curved impact screen can offer a more immersive and realistic experience, it's essential to weigh the benefits against factors like cost, space, and installation complexity to determine what's best for your specific needs and preferences.
“You'll want to avoid doing a curved screen that isn't necessary,” Carl said. “If you don't have the space to really significantly increase your FOV, the added complexity of a curved screen probably isn't worth it.”
Check out this awesome curved screen setup/walk-through video from Carl’s Place customer Ryan! And yes, Carl can make a 30-foot wide screen that can be used in a curved setup!
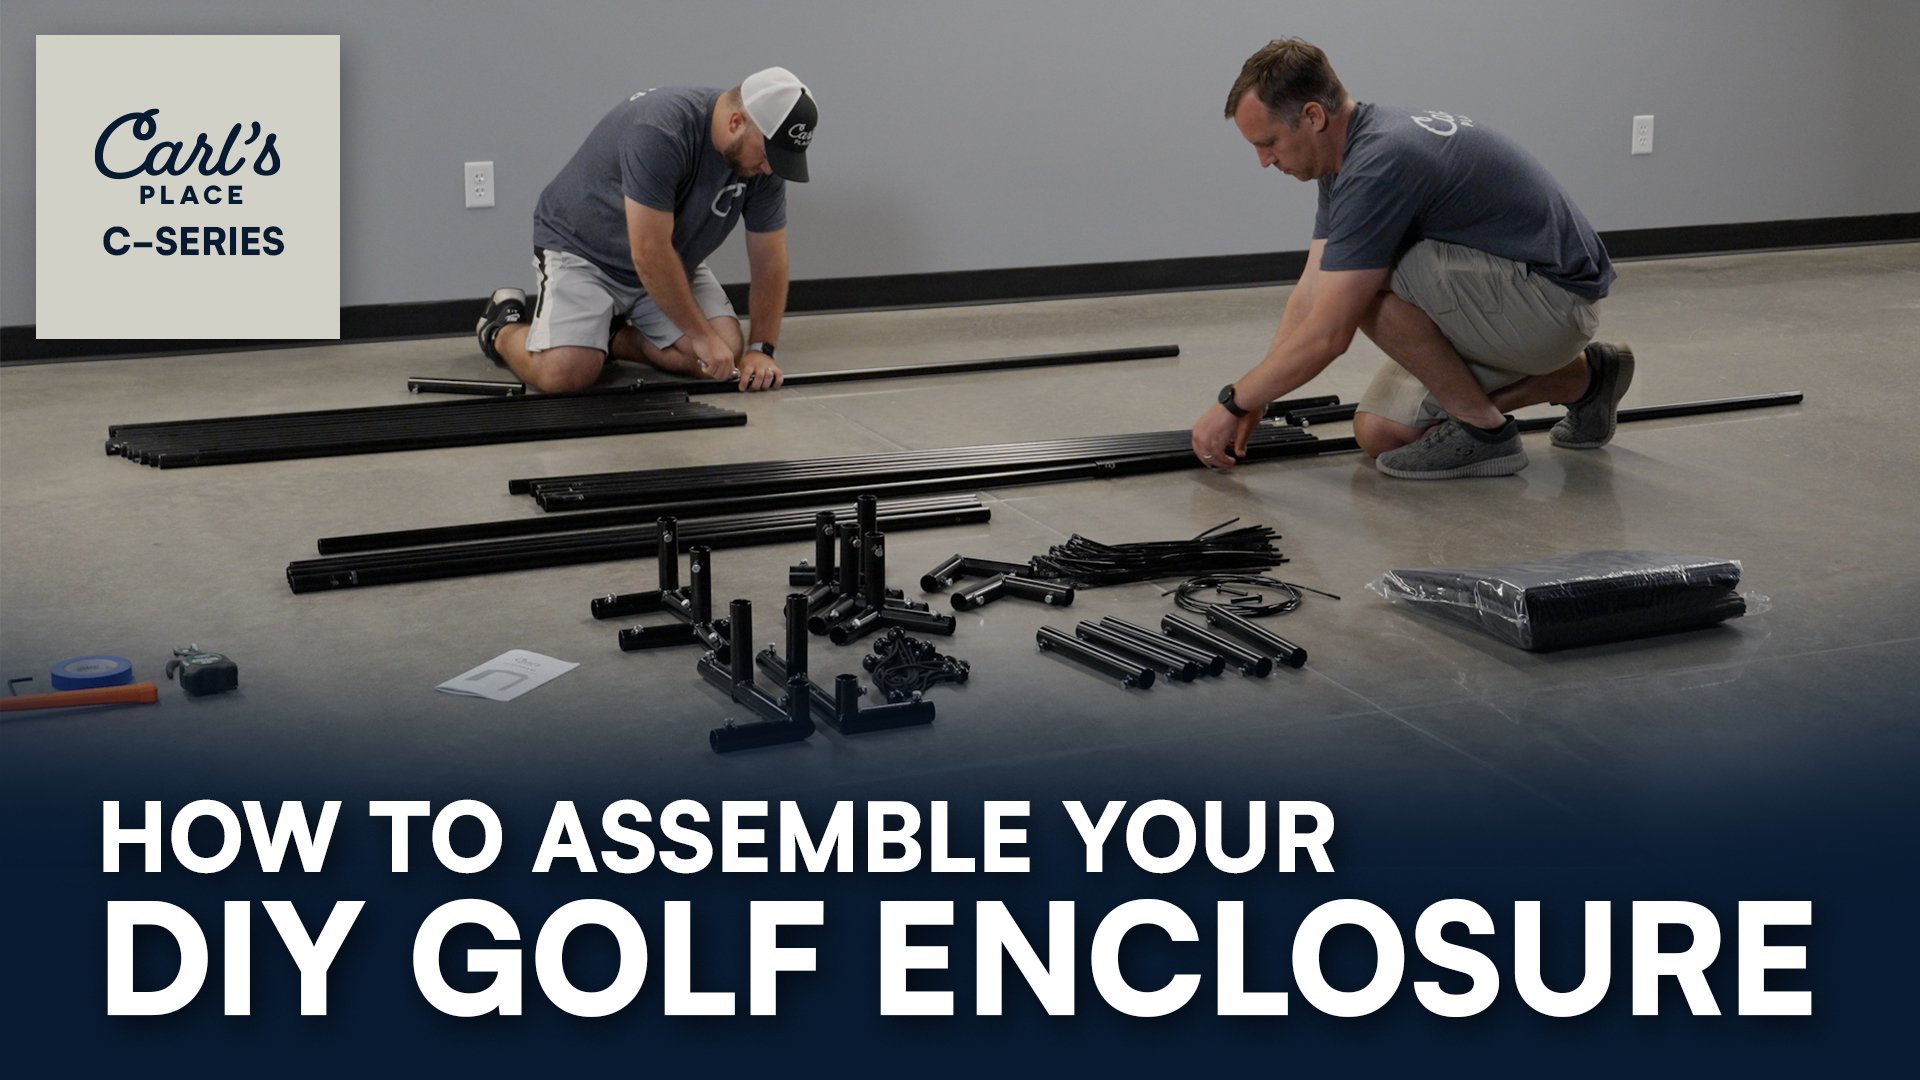
How To Make A Curved Golf Simulator Screen Frame
Creating a curved golf simulator screen requires careful planning and attention to detail.
“There are lots of ways to do this, ranging from just putting fasteners in a ceiling along a curved profile to building a big wood arch or bending a pipe,” Carl said. “The best approach will just involve what kind of materials you're most comfortable working with.”
Knowing that the word “frame” could have several different meanings in this use, here's a high-level overview of the process:
-
Gather Materials: You’ll need wood, piping or fasteners to form the frame structure that the screen will attach to; connectors to securely join the pipes (if that’s the route you choose); hardware such as screws and brackets to secure the screen frame to the surrounding structure.
-
Design the Frame: determine the desired curvature of the screen and design the frame accordingly. This may involve using curved aluminum or steel framing, a wood arch or putting fasteners in a curve on a ceiling. Ensure the frame is sturdy enough to support the weight of the impact screen and withstand tension during installation.
-
Construct the Frame: Assemble the frame according to your design. Double-check the dimensions and curvature to ensure they match your intended design.
-
Mount the Frame: Use mounting hardware to secure the screen to the surrounding structure, ensuring it is stable and positioned at the correct angle for optimal projection.
-
Prepare the Impact Screen: Order your impact screen to size. We suggest measuring the dimensions of your curved frame and ordering to those dimensions; be sure to measure the width of the screen along the curve and not straight across. Check out all the different ways that we can finish the edge of an impact screen to help in your specific setup. The most common for this type of setup is the classic finish with grommets to make mounting easiest; we can even add more grommets to the finished edge of the screen as more connection points means a smoother curve.
-
Attach the Impact Screen: If you went the classic finish with grommets route, you can use zip ties or ball bungees to attach the impact screen to the frame, similar to how impact screens mount with our DIY or Pro enclosures. You’ll want to protect against worm-burners so you also need something at the bottom of the screen, such as a cable similar to our C-Series enclosures, or the same thing you plan for the top curve with a pad or bumper. Or, you could just let extra material hang loose on the floor.
“You don't want tension on the sides of the screen or you'll pull your screen out of its curve, so just have a way to make sure all your shots are stopped from sneaking around,” Carl said. “There's no real right or wrong way to do it - it all just depends on what you like!”
What Projectors Work With A Curved Screen?

When it comes to projecting onto curved surfaces, projectors face limitations; the natural design of projectors is geared towards flat screens, so projecting onto curved surfaces presents challenges that can impact the overall image quality.
For screens with gentle curves, a single projector can be adjusted to accommodate the curve to some extent (more on that below). However, this adjustment may result in some loss of resolution and areas of imperfect focus. These compromises are a trade-off for trying to adapt a projector to a curved surface.
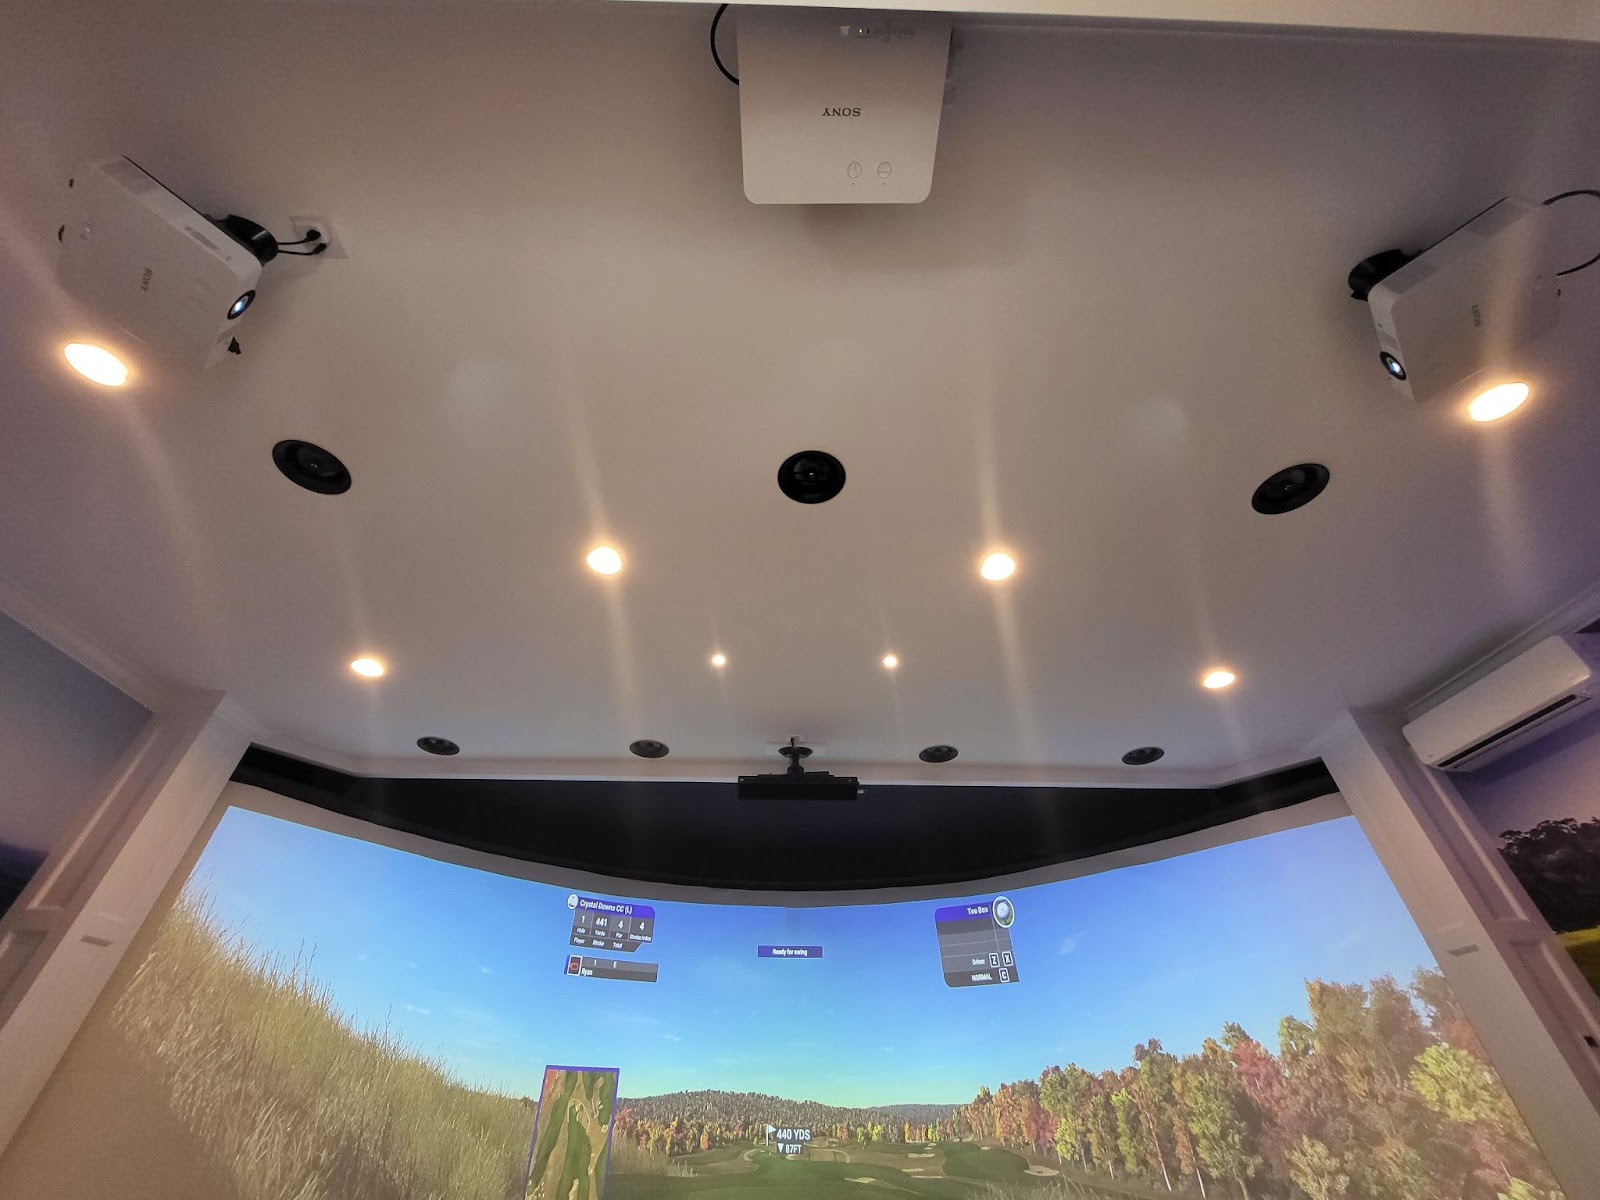
On larger curved screens, the issues of wasted pixels and focus become more pronounced. In such cases, utilizing multiple projectors to cover the curve can help minimize these effects.
By breaking up the curve with multiple projectors, you can distribute the projection more evenly and reduce the impact of the curve on image quality. This approach allows for a smoother and more cohesive projection onto curved surfaces, mitigating the challenges that arise when trying to project onto non-flat screens.

Can Any Projector Work With A Curved Screen?
While there aren't projectors designed exclusively for curved screens, there are certain features and specifications to consider when choosing projectors for use with curved screens:
- Warping: Some higher-end projectors, such as the BenQ AK700ST, BenQ LK936ST, Epson L695SE and LG BU53RG, offer warping, which refers to the digital manipulation of an image to correct or adjust its shape when projected onto uneven or irregular surfaces. This technique allows the image to appear correctly proportioned and aligned despite the distortions that naturally occur due to the surface irregularities.
- Lens Shift and Keystone Correction: Look for projectors with lens shift and keystone correction capabilities. These features allow you to adjust the projected image horizontally, vertically, and angularly, compensating for any distortion or misalignment caused by the curved screen.
- Short Throw Projectors: These are preferred for curved screens as they can project large images from a short distance, minimizing the space required between the projector and the screen. This is especially beneficial when dealing with the unique geometry of curved screens.
- High Brightness and High Resolution: Choose projectors with high brightness levels and high resolution to ensure clear, vivid, and detailed images on the curved screen surface. High brightness helps maintain image quality in well-lit environments, while high resolution ensures sharp and crisp visuals, especially on larger curved screens.
“The BenQ LK936ST (and AK700ST) and the LG BU53RG projectors both have great features for this, so I would recommend one of those if you're doing a single-projector curved screen,” Carl said. “If you're doing multiple projectors, you're going to need software for the blending, and that's going to give you the warp function you need also. So, in that case, any projector will do, but you want to make sure to get identical ones so that the brightness and sizing is all a perfect match.”
The Epson L695SE also makes for a great fit for curved screen enclosures. Compact and lightweight design featuring a wide vertical and horizontal lens shift, 1.4x optical zoom, 360-degree mounting, built-in geometric correction tools and a universal VESA mounting pattern. The Epson projector has features that make setup on a curved screen a breeze.
By selecting projectors with these features and specifications, you can effectively utilize them with curved screens to create immersive and realistic visual experiences for applications such as golf simulators, immersive displays, and panoramic video walls.
Setting Up Multiple Projectors To Work On A Curved Screen
Software can be used to stitch together multiple projected images so that they appear as one. This is often done on large stages where super wide screens are needed, but it also works well for curved screens.
A typical curved golf simulator screen setup will have three projectors mounted so that the images overlap each other by 20 percent or so. Software is then used for "edge blending" the projections so that the user doesn't see double images or variations in brightness.
Some of the top edge-blending software options include:
Also, some projector manufacturers offer proprietary software for edge blending and projector management. For example, Panasonic's Multi Monitoring & Control Software provides tools for edge blending and color matching Panasonic projectors in multi-projector setups.
Screen Radius Matters
Keep in mind that the curvature of your screen does have a large impact on the process.
Smaller radius curves - those that are tighter and curve more - are more difficult to project onto.
Typically you would want the sim user to be standing at the center of the curve or closer to keep the build efficient. So if you golf from 10 feet away, make the radius of the curve at least 10 feet. If you're golfing from 12 feet away, do a 12-foot or larger curve.
Even a 15 or 18 foot curve is helpful for gaining FOV, and at that point your bystanders will be within "the circle" also for good viewing. The wider overall the screen gets, however, the more likely you are to really benefit from multiple projectors.
A curved screen that fits in the space of a 180-inch wide flat screen is the equivalent of projecting 230 inches wide, so projector selection and placement is very important.
Also, when mounting the projectors, you'll want them to be fixed in a very stable way, because any shifting of alignment will result in a sort of ghosted image where the projectors overlap.
Conclusion
In conclusion, a golf simulator with a curved impact screen offers an immersive experience with a wider field of view and enhanced depth perception, but it also adds some sophistication to your setup.
Is the more realistic experience worth the higher cost and more complex installation process? Ultimately, the choice depends on your preferences, budget, and technical skills, ensuring an informed decision for maximum enjoyment of virtual golfing.
Search articles by tag:
Golf Impact Screens Golf Simulators ProjectorsRelated Posts
How-To, PRO Golf Enclosures
Moving Your Golf Simulator - How To Add Caster Wheels
How-To, DIY Golf Enclosures, Golf Simulators
How to Assemble a DIY Golf Simulator Enclosure Kit
How-To, Golf Enclosures
How to Assemble a Curved Golf Enclosure Kit